


NETbilling for WooCommerce takes credit and debit card payments through your NETbilling merchant account. Customers can save a card for faster checkout, and saved cards also pay WooCommerce Subscriptions renewals and WooCommerce Pre-Orders. The plugin is free on WordPress.org, and you need a NETbilling merchant account to use it.
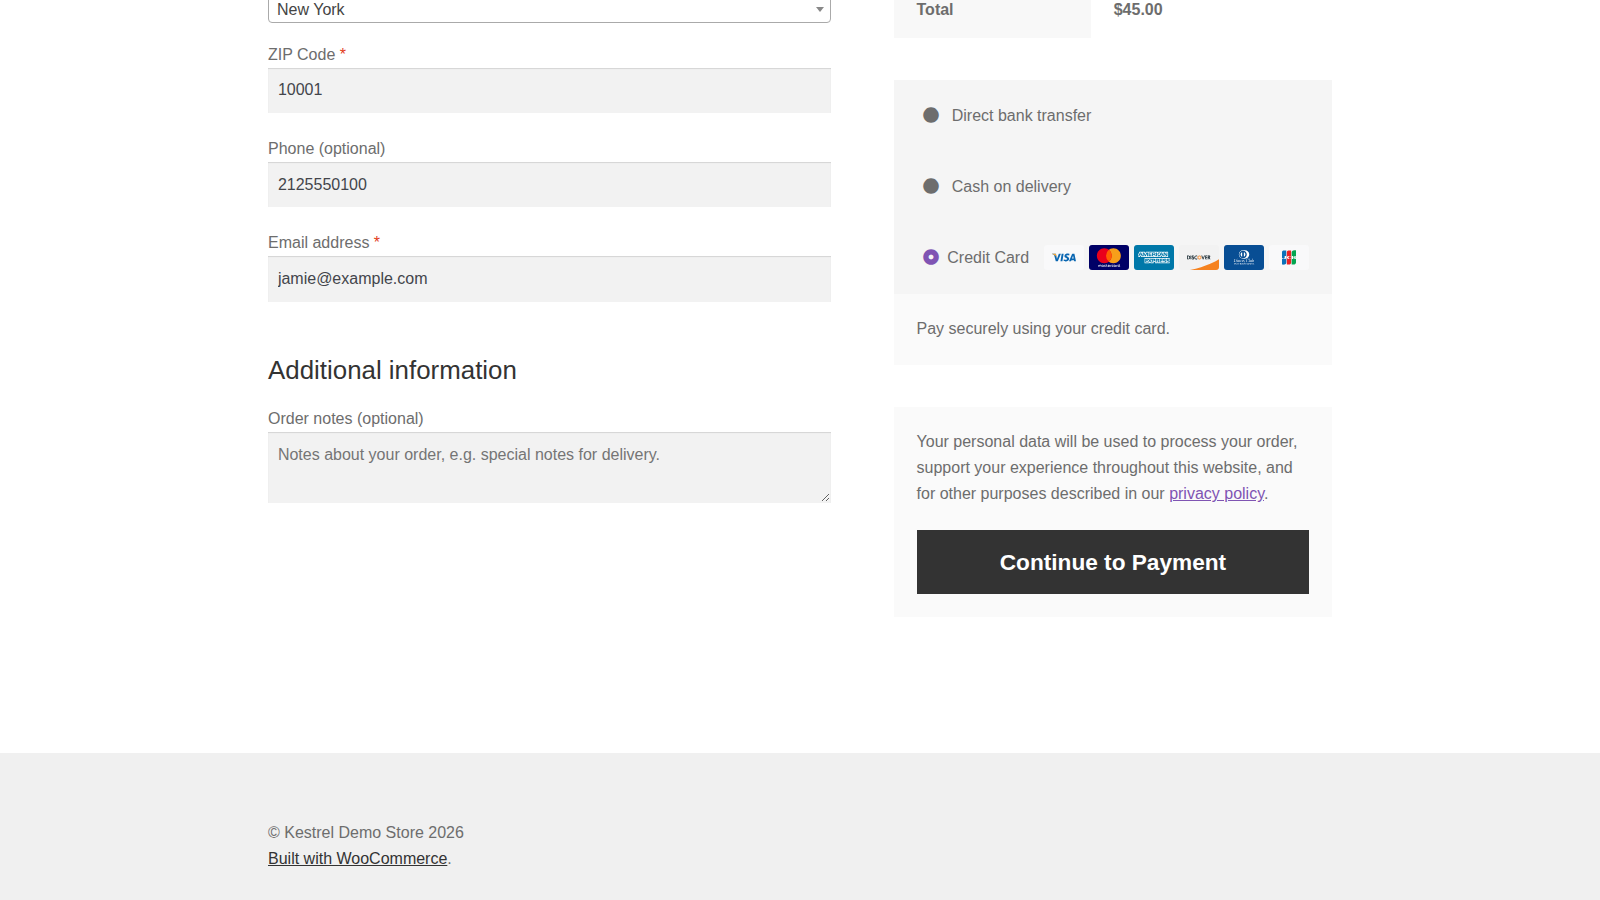
The plugin adds two payment gateways: the current NETbilling Direct Post – Credit Card gateway and the older NETbilling API – Credit Card gateway. Use one of them, not both (see Choose a gateway).
When you’d use this
- Take card payments on your WooCommerce store with an existing NETbilling account.
- Let customers save a card for repeat purchases, subscription renewals and pre-orders.
- Keep card details off your server with the Direct Post gateway.
Requirements
- WordPress 6.2 or later, WooCommerce 8.2 or later, and PHP 7.4 or later.
- A NETbilling merchant account, with your Account ID and Site Tag.
- WooCommerce’s classic checkout. Neither gateway appears in WooCommerce’s checkout block, so use the classic (shortcode) checkout page.
- An SSL certificate, so your checkout loads over HTTPS.
- For the API gateway, and for saved cards and subscription renewals on either gateway: your host must allow outbound connections on TCP port 1402, and your server’s IP address must be registered in your NETbilling account (see step 2).
- Compatible with High-Performance Order Storage.
Install and activate
NETbilling for WooCommerce is a free plugin from WordPress.org, with no license key.
- In your WordPress admin, go to Plugins » Add New Plugin.
- Search for "NETbilling for WooCommerce", click Install Now, then Activate.
You can also download it from WordPress.org and upload it. Updates appear on your Plugins screen like any other WordPress.org plugin.
Choose a gateway
Both gateways take the same cards and support saved cards, subscriptions and pre-orders. They differ in where the customer types their card details.
NETbilling Direct Post – Credit Card
When the customer clicks Place order, they go to a Pay for order page on your store. Its card form sends the details straight from their browser to NETbilling, which returns them to your store’s order confirmation. Card numbers never pass through your server, which keeps your PCI compliance scope lower. This is the gateway to use for a new setup.
NETbilling API – Credit Card
The customer enters their card on your checkout page, and your server sends it to NETbilling. Every payment needs the port and IP setup in step 2. It’s kept for stores that set it up before Direct Post was available.
Only enable one. With both on, you’ll see "Both the API and Direct Post gateways are enabled. Only one NETbilling gateway should be used at a time." For help choosing, contact NETbilling support.
Switch gateways and keep saved cards
Customers’ saved cards belong to the gateway they were saved with. When you enable one gateway and turn the other off, the plugin offers to move saved cards across: "You have legacy payment tokens in your database that need to be migrated to the Direct Post payment gateway. Please click here to complete the migration process." Click the link in the notice to move them. If you switch back to the API gateway, a similar notice offers to move them back.
Set up NETbilling
1. Find your account details
You need your NETbilling Account ID, which NETbilling gave you when you signed up, and your Site Tag, which you set up in your NETbilling account. If you don’t have them, ask your NETbilling account representative.
2. Prepare your NETbilling account
Log in to your NETbilling account and set up the gateway you chose:
- Direct Post: copy the Postback CGI URL shown under the Postback CGI URL Configured setting in WooCommerce. It’s your site’s address followed by
/?wc-api=netbilling_credit_card. In NETbilling, go to Setup » Website Config and enter it as the Postback CGI URL. Then find your Order Integrity Key under Account Settings » Fraud Controls » Fraud Defense (step 12). - API gateway, or saved cards on either gateway: on NETbilling’s Access Security page, tick Enable Native Direct Mode v.3(SAS) Channel, then add your server’s IP address to the trusted IPs. Ask your host to allow outbound connections on TCP port 1402. If your server has no fixed IP address, see send a Dynamic IP Security Code.
- Saved cards: under Setup » Credit Cards, step 6, make sure repeat billing (PCI storage) is enabled, and confirm with your NETbilling account representative that it’s on for your account.
3. Set up the gateway in WooCommerce
- Go to WooCommerce » Settings » Payments and open the gateway you chose.
- Tick Enable / Disable.
- Enter your Account ID and Site Tag.
- For Direct Post, enter the Order Integrity Key, and tick Postback CGI URL Configured once you’ve added the URL in NETbilling.
- Keep Transaction Type on Charge.
- Click Save changes.
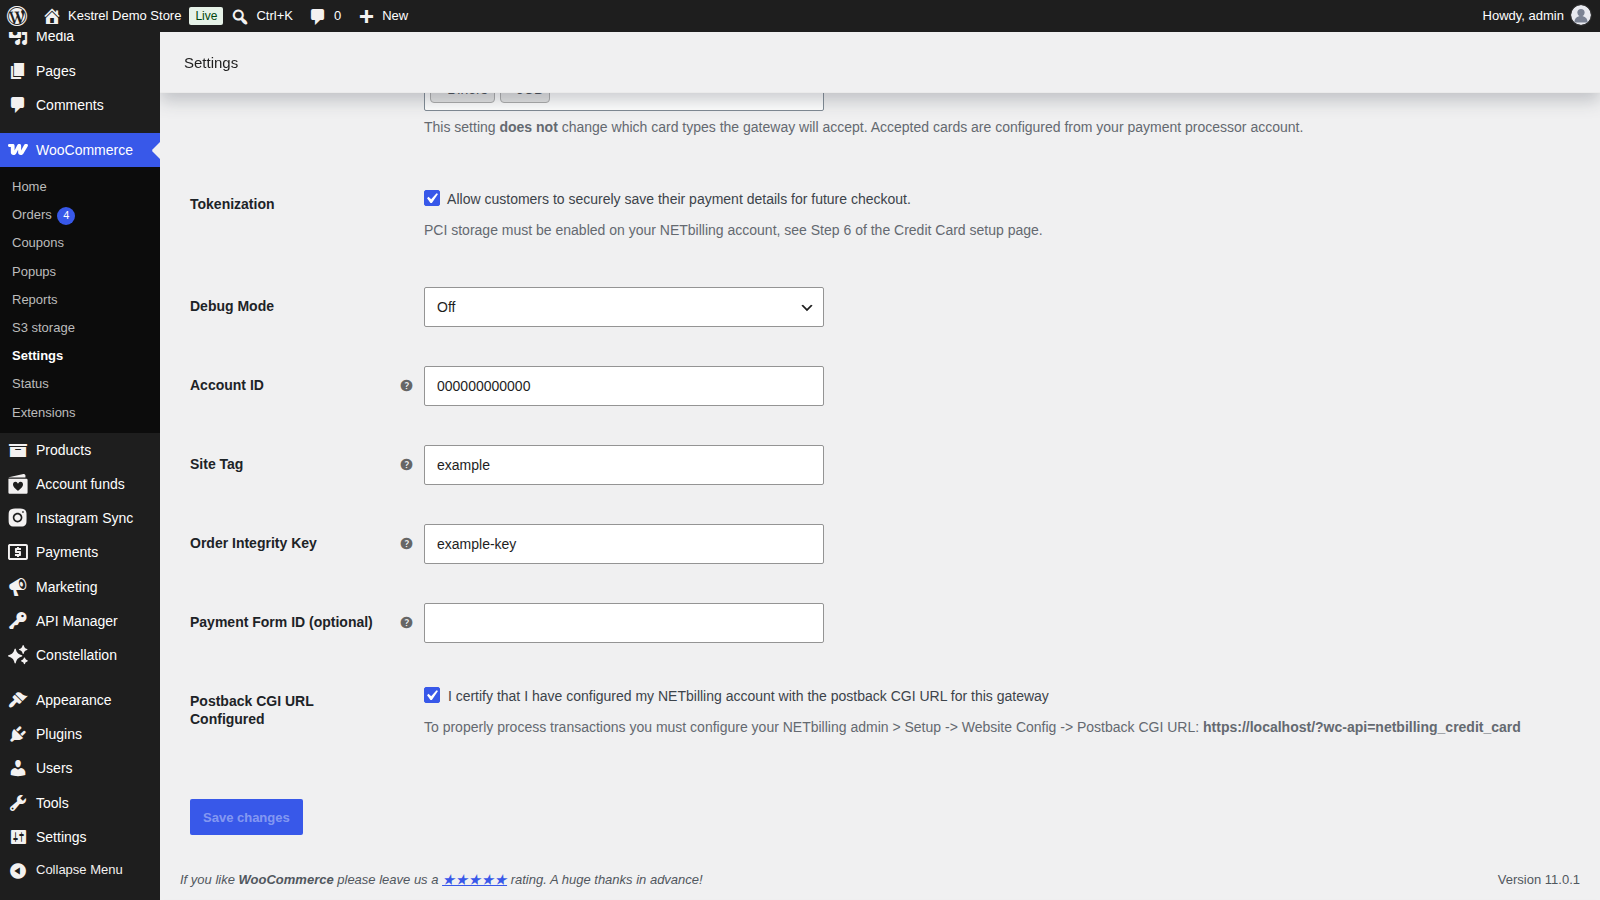
The gateway shows at checkout only once Account ID is set, and, for Direct Post in the Production environment, Postback CGI URL Configured is ticked.
4. Place a test order
Place a small order with a real card. The order should move to Processing, with an order note saying the charge was approved and giving NETbilling’s transaction ID. Then refund the payment in your NETbilling account and record the refund on the order (see Refunds).
Settings
Both gateways share these settings, under WooCommerce » Settings » Payments. The last three appear on the Direct Post gateway only.

Enable / Disable
Turns the gateway on at checkout. Off by default.
Title
The payment method name customers see at checkout. Default "Credit Card".
Description
The text under the title at checkout. Default "Pay securely using your credit card."
Card Security Code (CSC)
Shows the card security code field when customers enter a new card. On by default. Turn it on if your NETbilling account requires CVV2 checks.
Saved Card Security Code
Asks for the security code again when a customer pays with a saved card. On by default. Subscription renewals never ask for it.
Transaction Type
Charge (the default) takes the payment when the order is placed. Keep it on Charge: with Authorization, the plugin doesn’t complete authorizations on the API gateway or with saved cards, and doesn’t complete captures from the order screen. Charge Virtual-Only Orders and Capture Paid Orders appear only with Authorization.
Accepted Card Logos
The card logos shown at checkout. They’re for display only: the cards you can take depend on your NETbilling account.
Tokenization
Lets customers save their card for future checkouts. Off by default. It needs repeat billing (PCI storage) enabled in your NETbilling account, and it’s required for WooCommerce Subscriptions renewals and WooCommerce Pre-Orders.
Debug Mode
Off (the default), Show on Checkout Page, Save to Log or Both. Logging writes NETbilling requests and responses, with card numbers masked, to WooCommerce » Status » Logs. Turn it on only while you troubleshoot, and never leave Show on Checkout Page on for a live store.
Environment
Production or Test. Leave it on Production to take real payments.
Account ID
Your NETbilling Account ID.
Site Tag
The site tag set up in your NETbilling account. It decides which NETbilling email templates are used and tags the site for accounting if you use one merchant account on several sites.
Order Integrity Key
Direct Post only. The key from Account Settings » Fraud Controls » Fraud Defense (step 12) in NETbilling. The plugin uses it to check that payment results really come from NETbilling and weren’t changed on the way.
Payment Form ID (optional)
Direct Post only. Uses a specific NETbilling payment form instead of your site tag’s default. Leave it empty unless NETbilling gave you one.
Postback CGI URL Configured
Direct Post only. Tick it to confirm you’ve entered the Postback CGI URL shown here in NETbilling under Setup » Website Config. Off by default; in the Production environment, the gateway stays hidden at checkout until it’s ticked.
Saved cards and subscriptions
With Tokenization on, customers can save a card at checkout, or on the Direct Post Pay for order page. Your store keeps only a token for each card; the card details stay with NETbilling.
- Customers manage their saved cards under My Account » Payment methods, where they can make a card the default or delete it. They add a new card by checking out with it.
- WooCommerce Subscriptions renewals and WooCommerce Pre-Orders are charged to the saved card automatically. Both need Tokenization on, and subscriptions need recurring billing enabled in your NETbilling account. A card tied to an active subscription can’t be deleted from My Account until the subscription uses another card.
- Saved card and renewal charges go from your server to NETbilling, so they need the port and IP setup in step 2, even on the Direct Post gateway.
Refunds
The plugin doesn’t send refunds to NETbilling. Refund the payment in your NETbilling account, then record the refund on the WooCommerce order with Refund manually. The order’s transaction ID links to the transaction in your NETbilling account.
What customers see
- Direct Post: at checkout, customers choose the payment method, which shows its description, and click Place order. On the Pay for order page that follows, they enter their card (or choose a saved one) and click Pay for order. After NETbilling approves the payment, they land on the order confirmation page.
- API gateway: customers enter their card in the payment form on the checkout page.
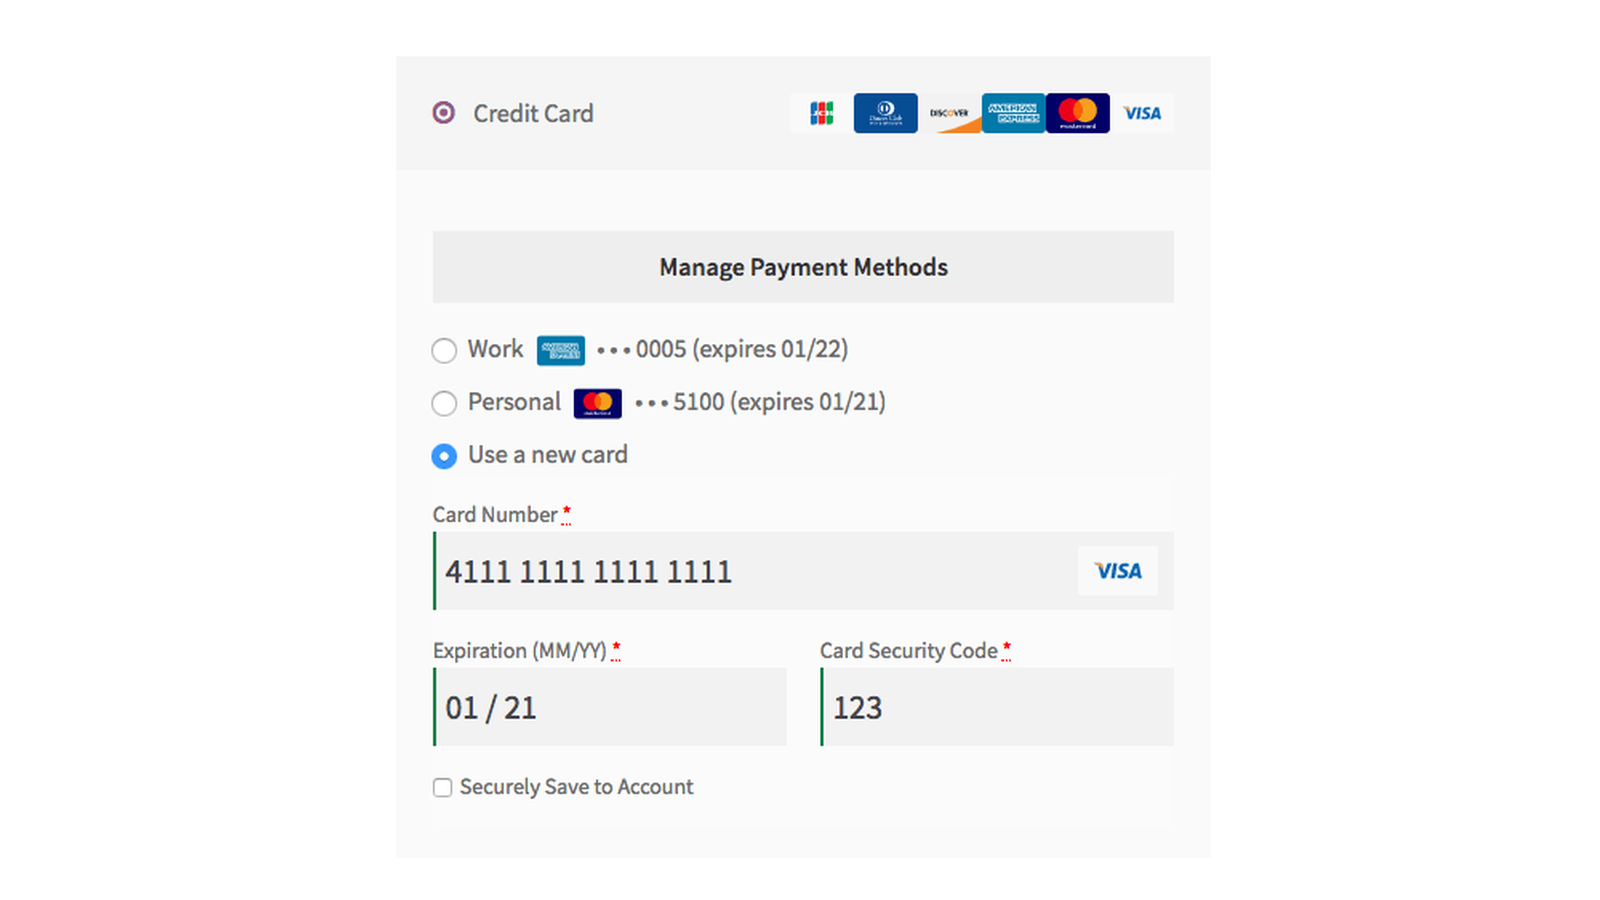
If the card is declined on Direct Post, the confirmation page says "There was an issue processing your payment, please try your order again." On the API gateway, the checkout shows an error.
Common issues
NETbilling doesn’t show at checkout
Check that:
- The gateway is enabled under WooCommerce » Settings » Payments.
- Account ID is filled in.
- For Direct Post in the Production environment, Postback CGI URL Configured is ticked.
- Your checkout page uses the classic checkout, not the checkout block. Edit the checkout page and switch to the classic checkout (the
[woocommerce_checkout]shortcode).
"Both the API and Direct Post gateways are enabled."
Turn off the gateway you don’t use. If customers have saved cards with it, move them with the migration notice (see Switch gateways and keep saved cards).
"You have legacy payment tokens in your database that need to be migrated to the Direct Post payment gateway."
You’ve switched to Direct Post and some customers saved cards with the API gateway. Click the link in the notice to move them, so customers and subscriptions keep using them.
Payments on the API gateway, or with saved cards, fail with a connection error
Your server can’t reach NETbilling. Ask your host to open outbound TCP port 1402, and check that your server’s current IP address is in NETbilling’s trusted IPs with Enable Native Direct Mode v.3(SAS) Channel ticked. If your host changes your IP address, add the new one, or use a Dynamic IP Security Code.
Customers see "There was an issue processing your payment, please try your order again."
NETbilling declined the Direct Post payment. The order stays unpaid, and the customer can try again with another card from My Account » Orders. Check the transaction in your NETbilling account for the reason.
Direct Post orders stay Pending payment after a successful payment
NETbilling couldn’t confirm the payment to your store. Check the Postback CGI URL in NETbilling matches the one shown in the gateway’s settings exactly, including https, and that the Order Integrity Key matches NETbilling’s.
Checkout fails after switching to Authorization
Set Transaction Type back to Charge. Authorizations don’t complete through the plugin on the API gateway or with saved cards.
"Card security code is missing" or "Card security code is invalid"
The customer left out the security code or entered something other than 3 or 4 digits. If your NETbilling account doesn’t require it, you can turn off Card Security Code (CSC) or Saved Card Security Code.
"WooCommerce is not being forced over SSL; your customers’ payment data may be at risk."
Your store’s checkout isn’t on HTTPS. Install an SSL certificate and make sure your site URLs under Settings » General start with https://.
Other errors
Set Debug Mode to Save to Log, try the payment again, and check the log under WooCommerce » Status » Logs for NETbilling’s response. Also check that your Account ID and Site Tag are correct. For help with the plugin, post in the plugin’s WordPress.org support forum. For account, fraud setting or decline questions, contact NETbilling support.
Keep learning
- NETbilling developer reference (changing request parameters and sending a Dynamic IP Security Code)
- NETbilling for WooCommerce on WordPress.org