


AWeber for WooCommerce connects your store to your AWeber account. It subscribes customers to your AWeber lists when they buy or register, tags them by what they bought, adds AWeber sign-up forms to your widget areas, and can track abandoned carts in AWeber.
AWeber for WooCommerce doesn’t send emails itself. It adds subscribers and tags to AWeber, and you build the emails and campaigns in your AWeber account.
When you’d use this
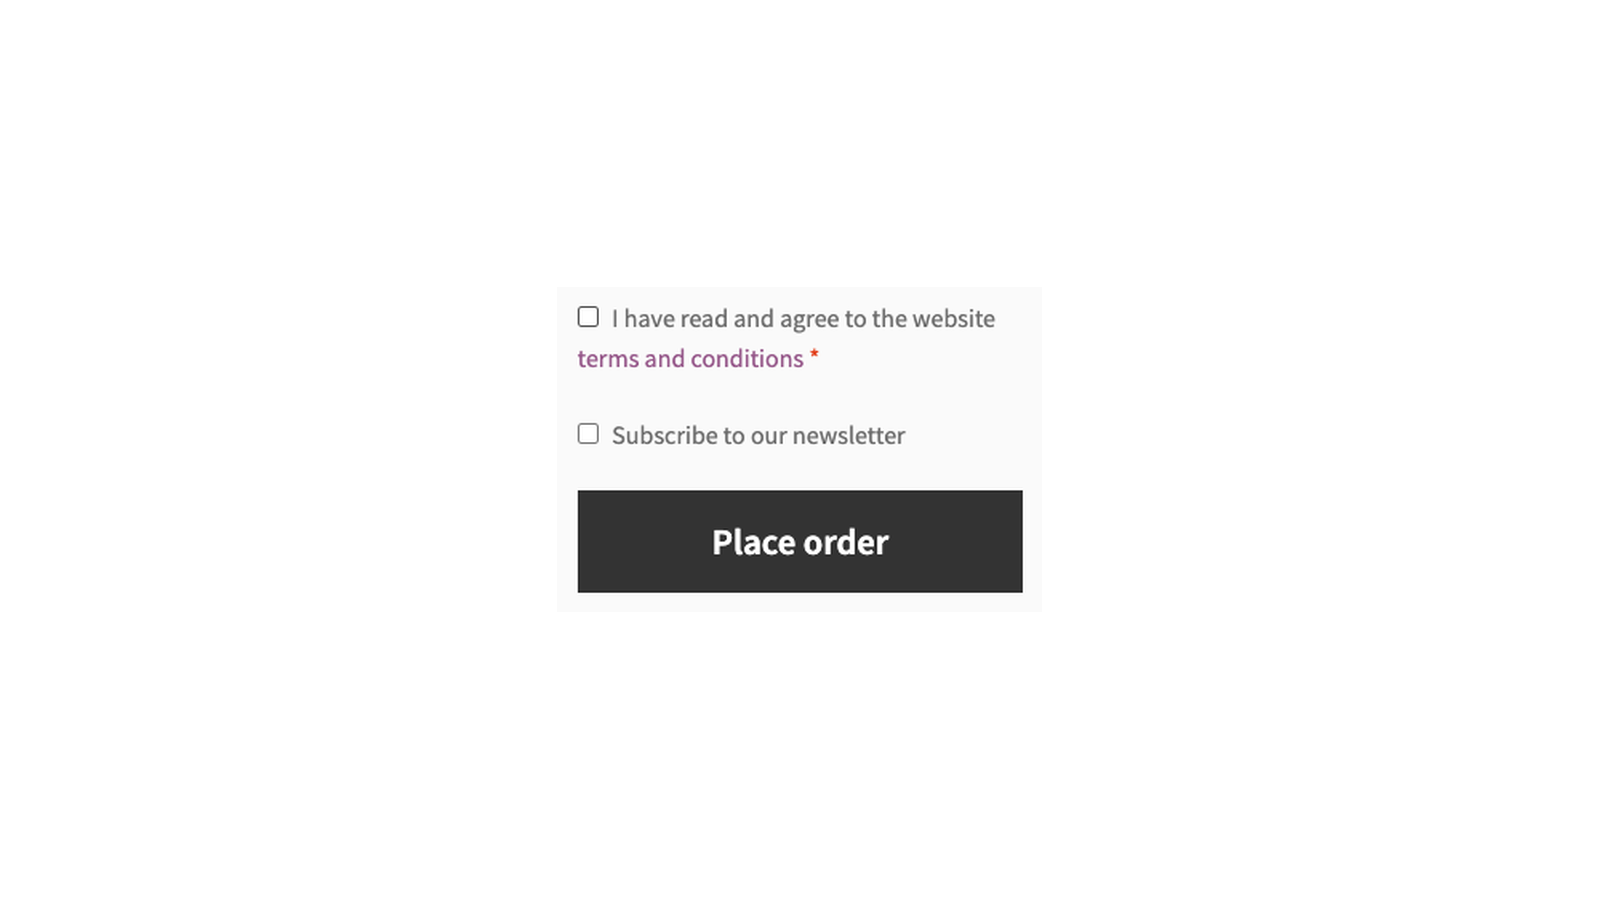
- Ask shoppers at checkout whether they’d like your newsletter.
- Add every buyer of a product or category to its own AWeber list, with or without asking.
- Tag subscribers with what they bought, so AWeber campaigns can follow up by product.
- Add a newsletter sign-up form to your sidebar or footer.
- Email shoppers who left items in their cart (see recover abandoned carts with AWeber).
Requirements
- WordPress 5.0 or later, WooCommerce 4.0 or later, and PHP 7.0 or later.
- An AWeber account with at least one list.
- WooCommerce’s classic checkout, from the
[woocommerce_checkout]shortcode, for the subscribe checkbox, optional checkout rules and abandoned cart tracking. AWeber for WooCommerce is marked incompatible with WooCommerce’s checkout block. Rules with Auto-subscribe on still run for orders placed with the checkout block. - Compatible with High-Performance Order Storage.
- The widgets are classic widgets, so your theme needs widget areas.
Install and activate
- Bought on WooCommerce.com: install the plugin from your WooCommerce.com account. Updates come through your WooCommerce.com connection, with no license key to enter.
- Bought on kestrelwp.com: install the plugin by following how to install and update WooCommerce extensions.
If you’re updating from an older version, you may see a notice asking to update your store database. Click Run the updater to bring your previous settings across.
Set up AWeber
1. Connect your AWeber account
Go to WooCommerce » Settings » AWeber and click Authorize. You’re sent to AWeber to log in and allow access, then back to your store, which shows "Your AWeber account was authorized successfully." The plugin stores an access token, not your AWeber login.

The rest of the settings appear once you’re connected.
2. Add a checkout rule
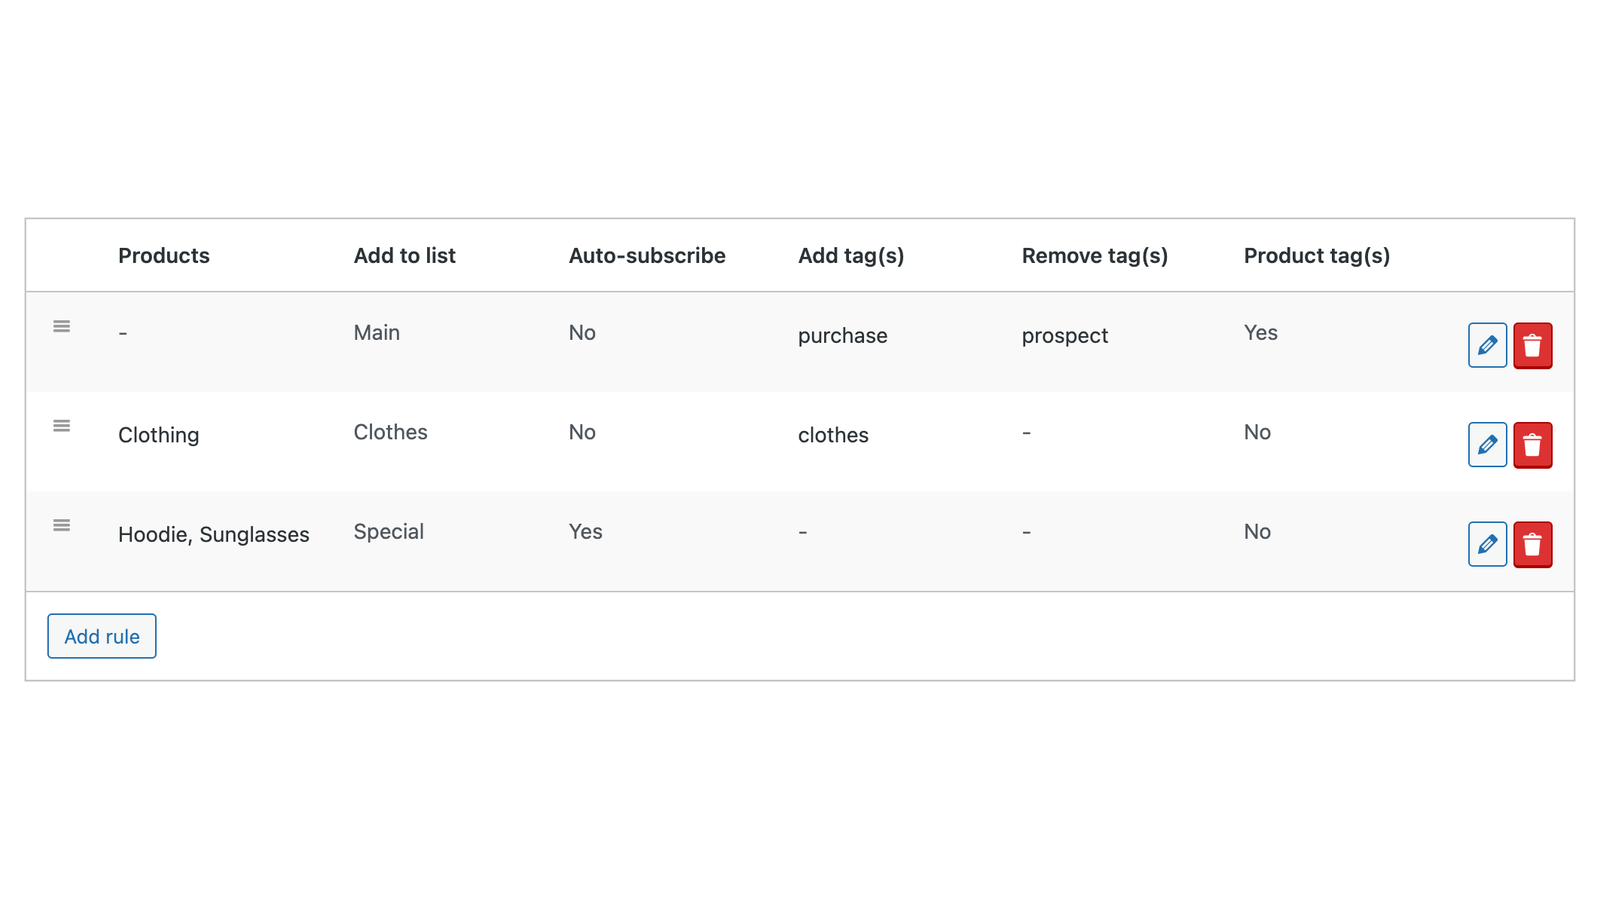
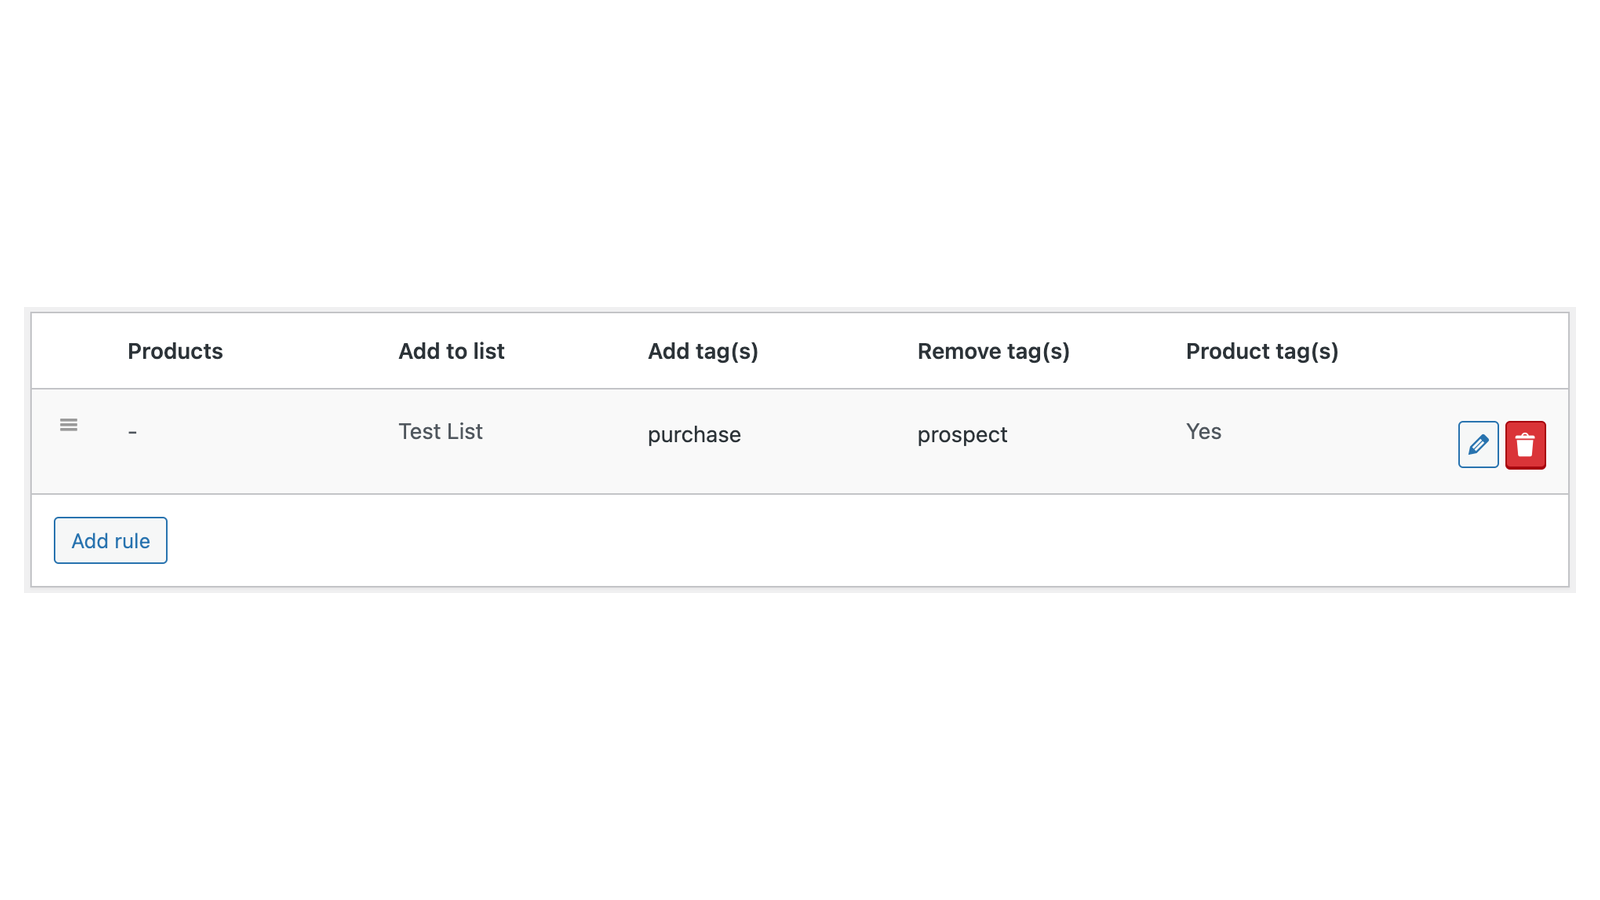
Under Checkout rules, click Add rule. Choose which Products or Product categories the rule applies to (leave both empty for every order), pick the list under Add to list, and add any tags. Save the rule. See checkout rules for every field.
3. Choose how the checkbox looks
Back on the AWeber settings, set the Subscribe label, the Checkout location and whether it’s ticked by default, then click Save changes.
4. Place a test order
Add a product your rule covers to the cart and go to the checkout. Tick the subscribe checkbox and place the order. Once the order’s status first changes (or it reaches a status you picked under Subscribe on order statuses), the email address appears in your AWeber list with the rule’s tags.
Checkout settings
Subscribe label
The text next to the subscribe checkbox, at checkout and on the registration form. Default "Subscribe to our newsletter".
Subscribe checked
Ticks the subscribe checkbox by default. Off by default. Check your privacy laws before turning it on: in the European Union, for example, consent must be opt-in.
Checkout location
Where the checkbox shows on the checkout: After the Terms and Conditions (the default), just above the place order button, or After billing details.
Subscribe on order statuses
When customers are subscribed. Leave it empty to subscribe them at the order’s first status change, usually when the order is placed or paid. Pick statuses, such as Completed, to wait until the order first reaches one of them. Each order is processed only once.
Checkout rules
The rules that decide which lists customers join, listed in a table you can sort. See checkout rules.
Checkout rule fields
Each rule adds customers to one AWeber list when their order includes products the rule covers. Click Add rule to create one, or Edit to change it.
Products
The products the rule applies to. Choosing a variable product covers all its variations.
Product categories
The categories the rule applies to. Select every category you want covered, including subcategories. If you leave both Products and Product categories empty, the rule applies to every order.
Add to list
The AWeber list customers are subscribed to. Required. If your account has no lists, the rule editor shows "No AWeber list found"; create a list in AWeber first.
Auto-subscribe
Subscribes customers to the list without asking. With it off, the rule is optional: the customer is only subscribed if they tick the subscribe checkbox at checkout. Auto-subscribe rules apply to orders from the classic checkout and the checkout block, and to any other order once its status changes. Make sure you have your customers’ consent before using it.
Add tags
Tags added to the subscriber. Pick existing AWeber tags, or type new ones separated by commas.
Remove tags
Tags removed from the subscriber, such as prospect once they buy.
Product tags
Tags the subscriber with each purchased product the rule covers, using the product’s slug. Off by default.
Product tag format
The format of those product tags. {product-slug} is replaced with the product’s slug, so bought-{product-slug} tags a purchase of the product blue-mug as bought-blue-mug.
How rules combine
- Every rule that matches an order runs, so one customer can join several lists.
- Rules with Auto-subscribe off only run if the customer ticked the checkbox.
- When several rules add to the same list, their tags are combined. A tag that any of them removes is removed, even if another rule adds it.
- If the customer is already on the list, their name and tags are updated. Tags that no rule mentions are left alone.
When the checkbox shows
The subscribe checkbox shows on the classic checkout only when the customer has something to agree to:
- At least one rule with Auto-subscribe off covers a product in the cart, or
- The shopper isn’t logged in, can create an account at checkout, and you’ve set a Registration list.
If only auto-subscribe rules match, there’s no checkbox, because customers join those lists either way.
Registration settings
These subscribe customers when they create an account on your store.
Registration list
The list new accounts can join. Leave it empty to turn this off. With a list set, a subscribe checkbox appears on the My account registration form. At checkout, the same checkbox subscribes the shopper to this list only if they also create an account. Both forms use your Subscribe label and Subscribe checked settings.
Account creation itself is set in WooCommerce under WooCommerce » Settings » Accounts & Privacy.
Add tags
Tags added to customers who subscribe when they register, such as registered.
Remove tags
Tags removed from them, such as prospect.
AWeber Account settings
Deauthorize
Disconnects your store from AWeber by removing the stored access token. Click Authorize to connect again.
Sign-up form widgets
Go to Appearance » Widgets and add either widget to a widget area, such as your sidebar.
WooCommerce AWeber Web Form
Shows a sign-up form you designed in AWeber. Choose it under Web Form, and set a Title or leave it empty. In-line forms show where the widget is; pop-over and lightbox forms open over the page, and pop-out forms open a new window. If you have no forms yet, the widget asks you to create one in AWeber.
WooCommerce AWeber Newsletter Subscription
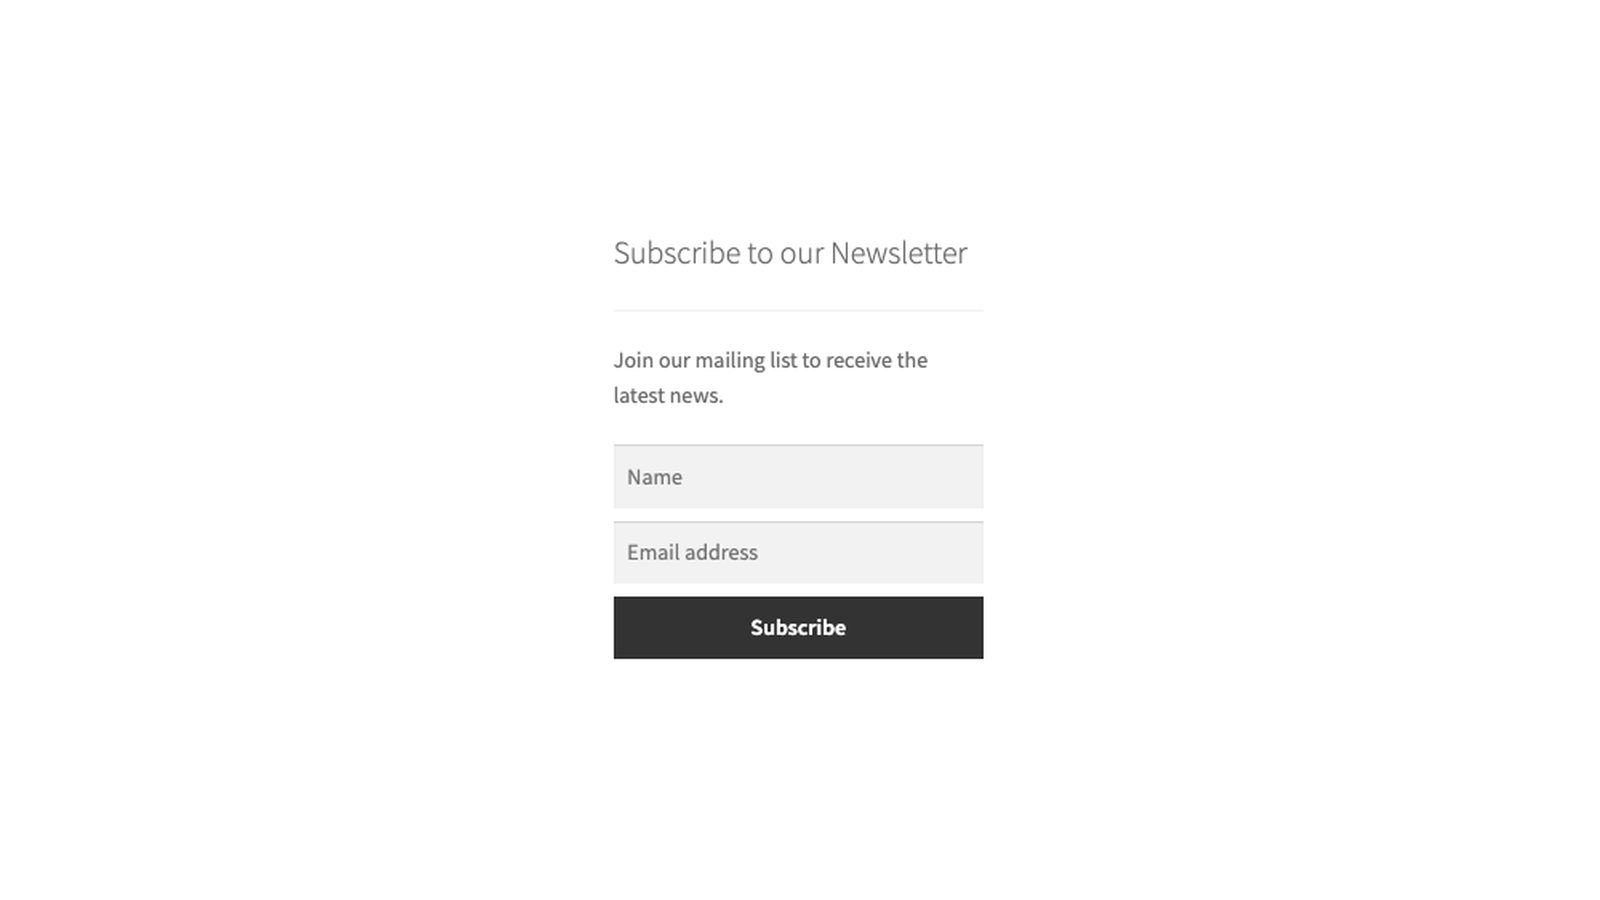
A simple name and email form that picks up your theme’s styles. Choose the List, and edit the Title and Message if you like. Visitors see "Thanks for subscribing." once they’re added.
Dashboard widget
The WooCommerce AWeber subscribers widget on your WordPress dashboard shows subscribed, unsubscribed and total counts for each list the plugin uses. For more detail, check your AWeber account.
Privacy
The plugin sends customers’ names, email addresses, an IP address (the shopper’s when they’re subscribed at checkout) and, with product tags, what they bought, to AWeber when they’re subscribed, and stores abandoned carts in your store’s database. It stores an AWeber access token, never your AWeber login.
- WordPress’s privacy policy guide includes suggested text under WooCommerce AWeber to copy into your privacy policy. It also covers the cookie the plugin sets when a shopper follows a cart recovery link.
- Tools » Export Personal Data and Tools » Erase Personal Data include a customer’s abandoned carts.
- Ask for consent the way your local laws require before using Subscribe checked, Auto-subscribe or abandoned carts for guests.
When you delete the plugin, it removes your AWeber connection. If your site’s wp-config.php sets WC_REMOVE_ALL_DATA to true, it also removes its settings. Stored abandoned carts stay in your database either way; to remove a customer’s carts, use Tools » Erase Personal Data.
Common issues
The subscribe checkbox doesn’t appear at checkout
- Your checkout uses WooCommerce’s checkout block. The checkbox only shows on the classic checkout; switch your checkout page to the
[woocommerce_checkout]shortcode. - No rule with Auto-subscribe off covers the products in the cart. Add or edit a rule.
- Only auto-subscribe rules match. They don’t need a checkbox.
A customer wasn’t added to the list
- They didn’t tick the checkbox, and the rule isn’t Auto-subscribe.
- The products they bought aren’t covered by any rule.
- The order hasn’t reached a status you picked under Subscribe on order statuses yet.
- They ticked the checkbox as a guest when only the Registration list applied, but didn’t create an account.
- AWeber blocked the address. Check the subscriber in your AWeber account.
If none of these apply, check the log under WooCommerce » Status » Logs, in the file starting wc_aweber_api_errors.
"Expired timestamp" in the error log
AWeber refuses requests from servers whose clock is more than 5 minutes off. Ask your host to set your server’s clock correctly.
"An unexpected error occurred." when you authorize
The connection to AWeber failed. Try Authorize again. If it keeps failing, check the wc_aweber_api_errors log and send it to support.
"Please refresh the page and try to connect to Aweber again."
The authorize link expired. Reload the settings page and click Authorize again.
Keep learning
- Recover abandoned carts with AWeber
- How to install and update WooCommerce extensions
- Changing text in a plugin (for wording the plugin’s settings don’t cover)