


Quick View adds a Quick View button to the products in your shop. Clicking it opens a pop-up with the product’s images, price, short description and add to cart form, including variation choices, so shoppers can look closer without leaving the page they’re browsing.
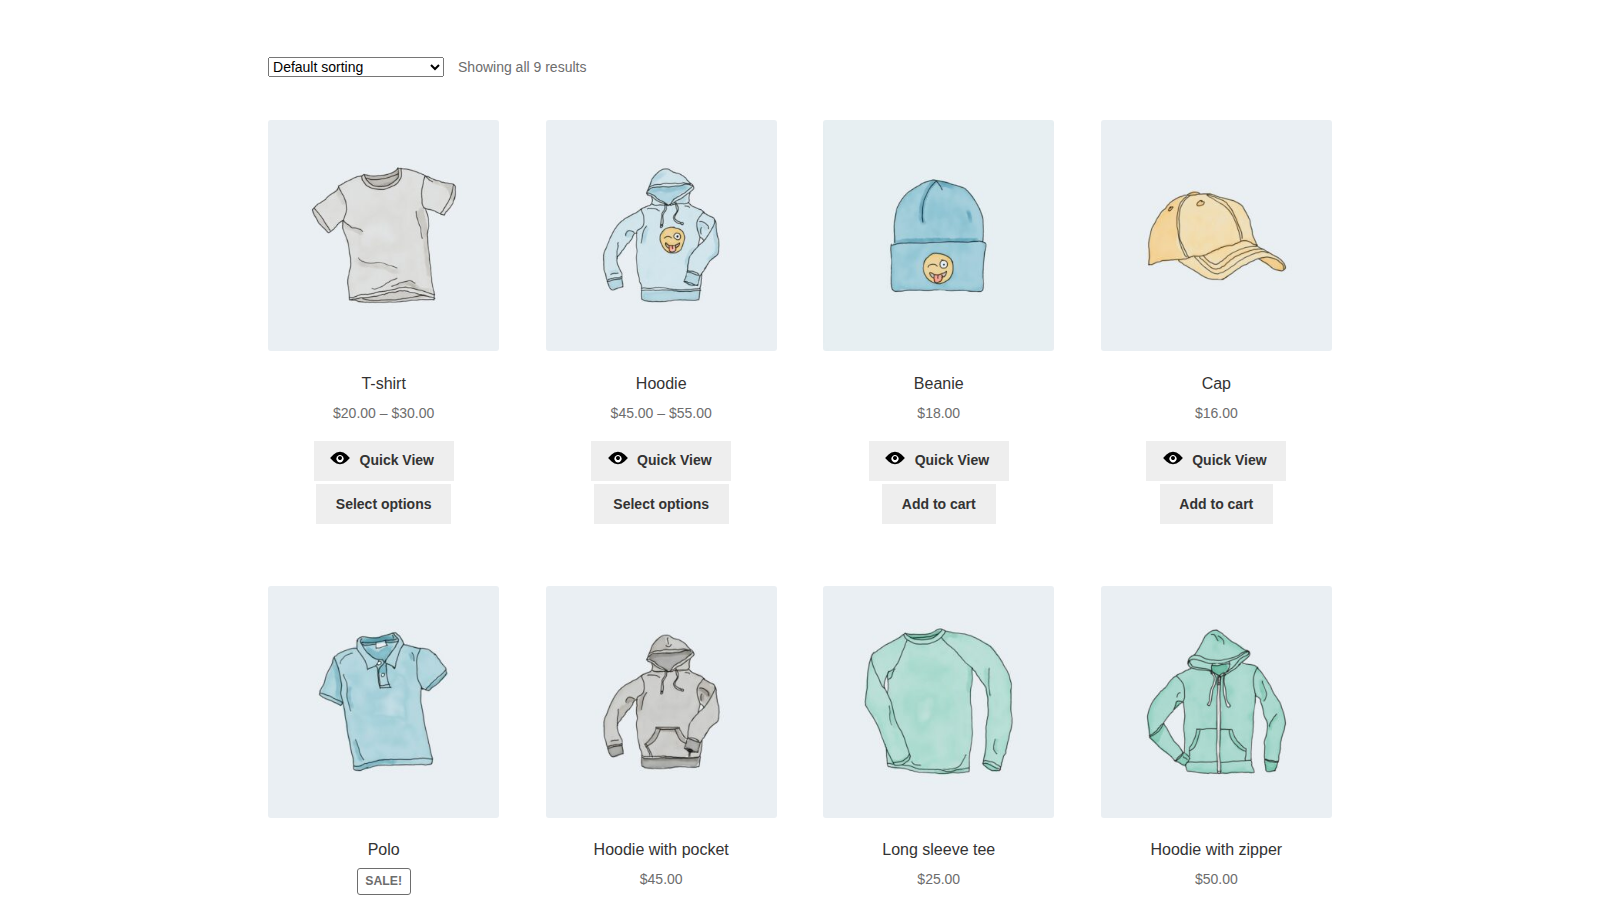
Quick View has one setting and no styling options. To change how the button or pop-up looks, use CSS or the templates in the Quick View developer reference.
When you’d use this
- Let shoppers check a product’s details and photos without opening its page.
- Let shoppers pick a size or color and add a variable product from the shop page.
- Open a preview instead of the product page when shoppers click Select options or Read more.
Requirements
- WordPress 6.3 or later, WooCommerce 8.2 or later, and PHP 7.4 or later.
- Compatible with WooCommerce’s cart and checkout blocks and High-Performance Order Storage.
- Store administrators and shop managers can change the setting.
Install and activate
How you get updates depends on where you bought Quick View:
- Bought on kestrelwp.com: download the plugin from the Licensed downloads tab of your kestrelwp.com account and install it. Then go to Settings » Quick View for WooCommerce activation and activate the key from your License keys tab to receive updates. See using sites against your activation limit for how activations count.
- Bought on WooCommerce.com: install the plugin from your WooCommerce.com account. Updates come through your WooCommerce.com connection, with no license key to enter.
For upload, FTP and update steps, follow how to install and update WooCommerce extensions.
Set up Quick View
1. Choose what opens the pop-up
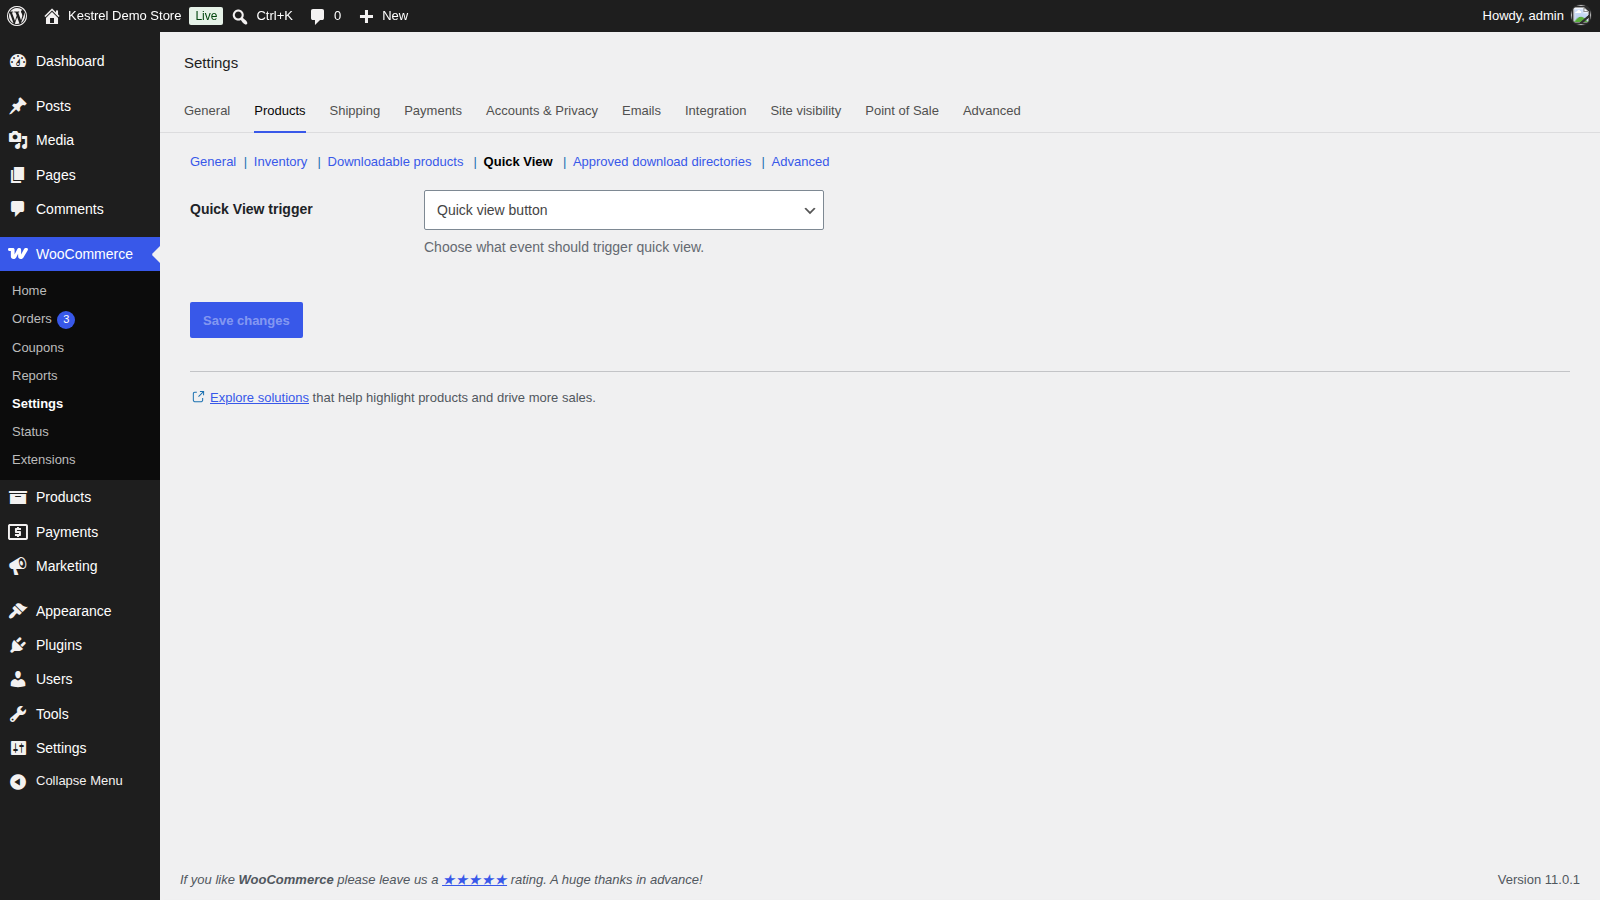
Go to WooCommerce » Settings » Products » Quick View. Leave Quick View trigger at Quick view button to add a button to each product, or choose Any non-ajax add to cart button (see Quick View trigger). Click Save changes.
2. Check it
Open your shop page in a private browser window and click Quick View on a variable product. The pop-up should open with the product’s images and options. Choose an option and add it to the cart.
Settings
Quick View trigger
What opens the pop-up:
- Quick view button (the default): a Quick View button is added before the add to cart button of each product in your product lists.
- Any non-ajax add to cart button: no button is added. Instead, product list buttons that would take shoppers to another page open the pop-up. That covers Select options on variable products, View products on grouped products, Read more on products that can’t be bought, and the buttons of external or affiliate products. Buttons that add a product to the cart without leaving the page keep doing that. If Enable AJAX add to cart buttons on archives is off in WooCommerce » Settings » Products, every add to cart button in your product lists opens the pop-up.
Where the Quick View button appears
- Your shop, product category and tag pages, on classic and block themes.
- Other product lists built with WooCommerce’s standard product loop, such as related products on classic themes.
- WooCommerce’s older product grid blocks, such as Products by Category and Hand-picked Products.
It doesn’t appear:
- On the main product of a single product page.
- In Product Collection blocks placed on pages other than your shop, category and tag pages.
- On a product’s later appearances on the same page, once an earlier product list has shown its button. WooCommerce’s older product grid blocks don’t count: a product in one of them still gets the button again in a list further down.
What customers see
Clicking Quick View opens the pop-up over a dimmed page. It shows what the product page shows in its main area: the sale badge, images, title, rating, price, short description, add to cart form, and the SKU, categories and tags. Below that is a View full details button to the product page. Shoppers close it with the × button, by clicking outside it or with the Escape key.
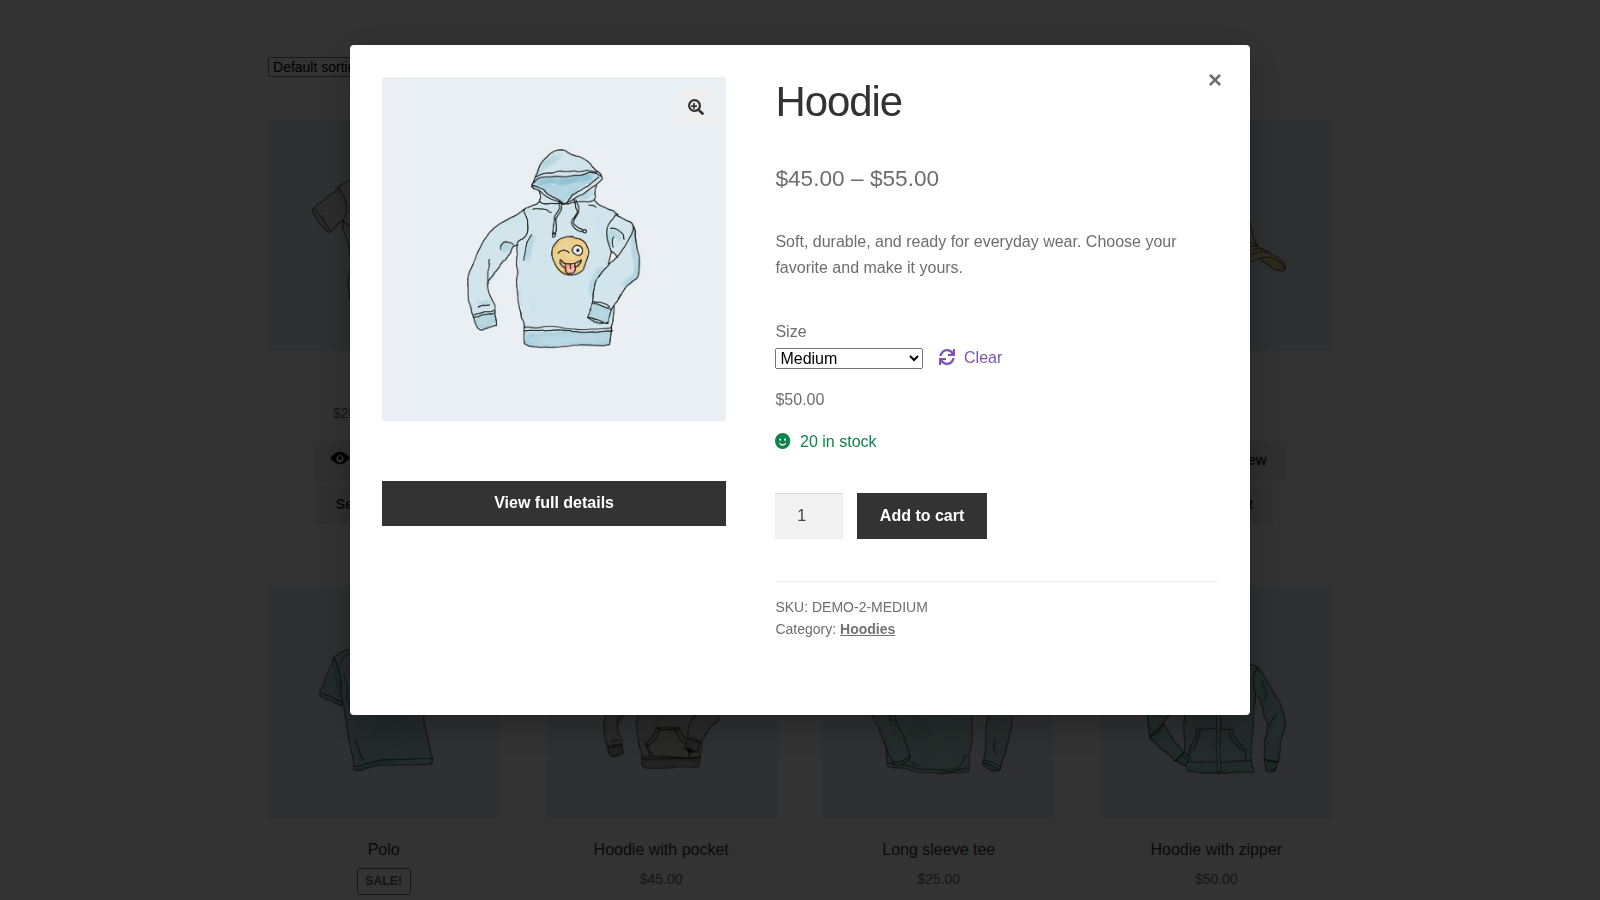
- Images: image zoom, the gallery slider and the lightbox work in the pop-up when your theme supports them on product pages.
- Adding to cart from the pop-up reloads the page the shopper is on and shows WooCommerce’s added to cart message. If Redirect to the cart page after successful addition is on in WooCommerce » Settings » Products, shoppers go to the cart instead.
- Other plugins’ product page content also shows in the pop-up when it’s added to that main area of the product page.
- Currency Converter for WooCommerce: if you use it, prices in the pop-up are converted like the rest of the page.
Common issues
The Quick View button doesn’t appear
- Quick View trigger is set to Quick view button. With the non-ajax option, there’s no button.
- The products are in one of the places the button appears. Product Collection blocks on other pages don’t get it.
- Your theme or page builder uses WooCommerce’s standard product list hooks. Switch to Storefront for a moment to confirm, then ask your theme’s author.
- Clear any page cache or optimization plugin cache after activating or updating Quick View.
Clicking Select options opens the pop-up instead of the product page
Quick View trigger is set to Any non-ajax add to cart button, which opens the pop-up from every product list button that would leave the page, external product buttons included. Choose Quick view button to keep those buttons going to the product page.
The pop-up doesn’t open, or the product page opens instead
That’s usually a JavaScript conflict. Temporarily turn off optimization plugins that combine, defer or delay scripts, and test again. If it still happens, switch to Storefront for a moment to rule out the theme.
The page reloads after adding to cart from the pop-up
That’s expected: the pop-up’s add to cart form submits like the one on the product page, then returns the shopper to the page they were on.
Image zoom or the lightbox doesn’t work in the pop-up
The pop-up uses the same gallery features as your product pages, and those come from your theme. If your product pages don’t zoom or open a lightbox, the pop-up won’t either.
Keep learning
- Quick View developer reference (templates and hooks for changing the button and pop-up)
- How to install and update WooCommerce extensions (installing, updating and fixing upload errors)
- Using sites against your activation limit (how license activations count)
- How to add custom CSS to your site (styling the button and pop-up)