


Subscribe to Newsletter adds customers to your email list. It puts a subscribe checkbox on your checkout and account registration form, adds a signup widget for your sidebar, and sends each subscriber to a list at your email provider. It works with ActiveCampaign, ActiveTrail, Brevo, Campaign Monitor, Mailchimp, MailerLite, MailPoet and SendGrid.
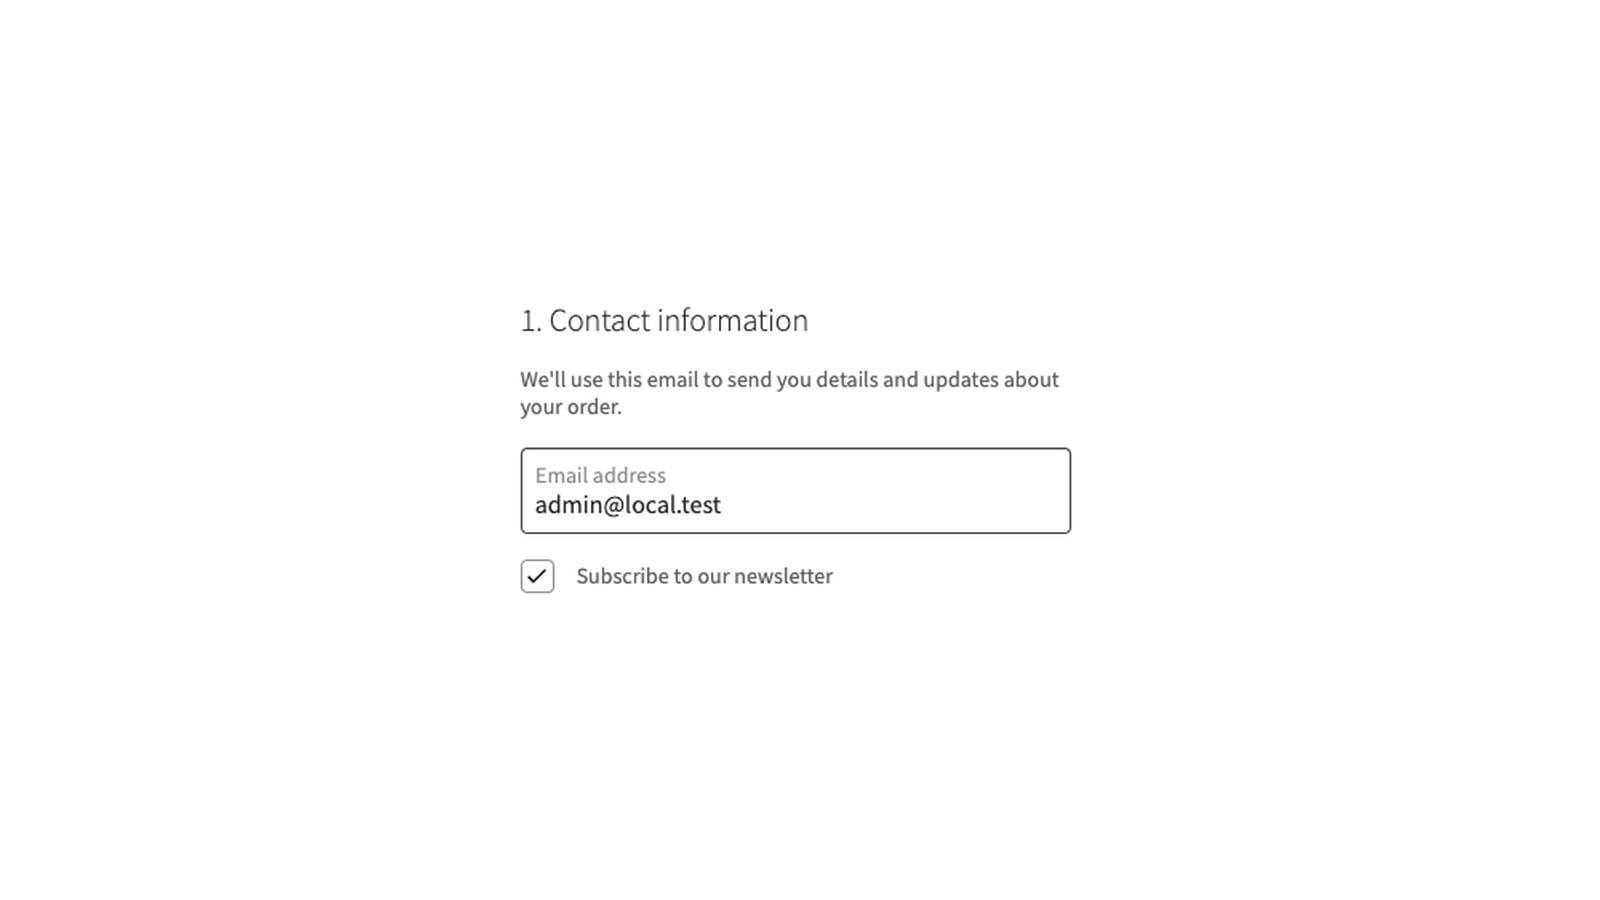
Subscribe to Newsletter connects one provider and one default list at a time. It only subscribes people; you write and send your emails in your provider’s own tools.
When you’d use this
- Ask customers to join your newsletter as they check out.
- Ask new customers to subscribe when they create an account.
- Collect signups from any visitor with a sidebar form.
- Tag Mailchimp or Brevo subscribers with the products they bought.
- Let customers manage their Mailchimp subscription from My Account.
Requirements
- WordPress 6.1 or later, WooCommerce 8.3 or later, and PHP 7.4 or later.
- Compatible with WooCommerce’s cart and checkout blocks and High-Performance Order Storage.
- An account with one of the supported providers, with at least one list.
- For MailPoet, the MailPoet plugin installed and active on your site.
Install and activate
How you get updates depends on where you bought Subscribe to Newsletter:
- Bought on kestrelwp.com: download the plugin from the Licensed downloads tab of your kestrelwp.com account and install it. Then go to Settings » Subscribe to Newsletter for WooCommerce activation and activate the key from your License keys tab to receive updates. See using sites against your activation limit for how activations count.
- Bought on WooCommerce.com: install the plugin from your WooCommerce.com account. Updates come through your WooCommerce.com connection, with no license key to enter.
For upload, FTP and update steps, follow how to install and update WooCommerce extensions.
Set up Subscribe to Newsletter
1. Connect your provider
Go to WooCommerce » Settings » Newsletter. Choose your provider in Service provider, enter the details it asks for (see Supported providers), and click Save changes.
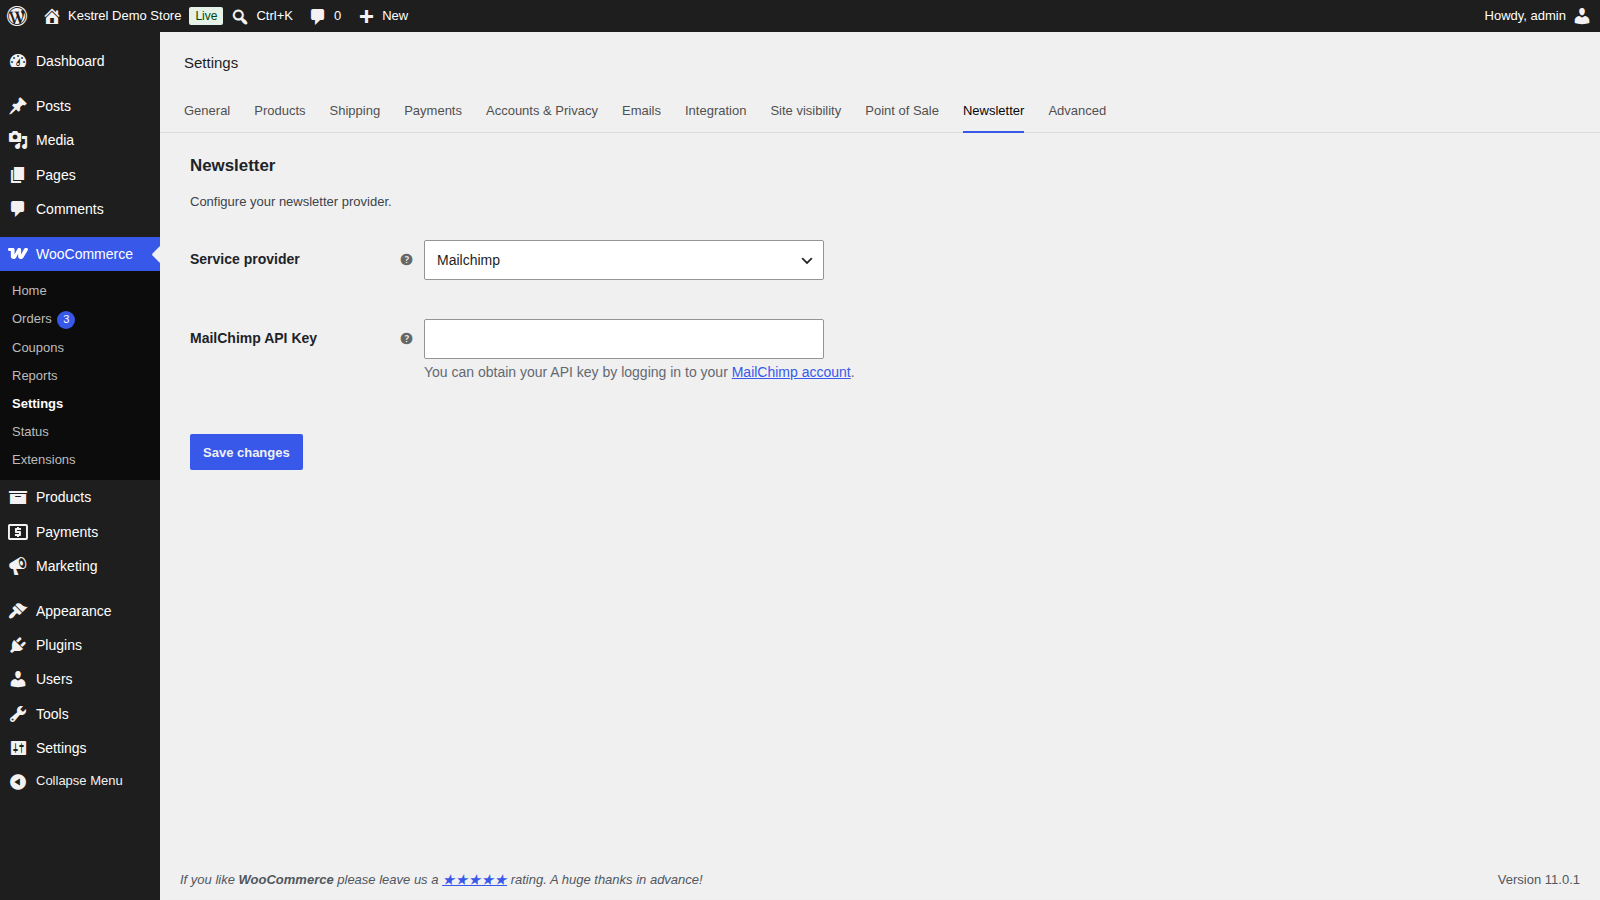
The plugin checks the details with your provider. Once they’re accepted, they’re shown read-only and the rest of the settings appear.
2. Choose the list
Pick the list customers join in your provider’s list field, such as MailChimp List. If your new list isn’t there, click Refresh. The subscribe checkbox and widget only appear once a list is chosen.
3. Review the subscription settings
Check the checkbox label, whether it starts ticked, and when customers are subscribed. See Subscription settings. Click Save changes.
4. Check it
Place a test order on your store with the subscribe box ticked, and with an email address you can open. Then find that address in your list at your provider. With Mailchimp’s double opt-in, confirm the email Mailchimp sends first.
Supported providers
| Provider | What you enter | Product tags | Newsletter page in My Account | Dashboard stats |
|---|---|---|---|---|
| ActiveCampaign | ActiveCampaign API URL and ActiveCampaign API Key | No | No | Yes |
| ActiveTrail | ActiveTrail API Key and ActiveTrail account type | No | No | Yes |
| Brevo (formerly Sendinblue) | Brevo API Key | Yes | No | Yes |
| Campaign Monitor | Campaign Monitor API Key | No | No | Yes |
| Mailchimp | MailChimp API Key | Yes | Yes | Yes |
| MailerLite | MailerLite API Key | No | No | Yes |
| MailPoet 3 | Nothing; uses the MailPoet plugin on your site | No | No | No |
| SendGrid | SendGrid API Key | No | No | Yes |
MailPoet 2 (Deprecated) is still listed for stores that used the old MailPoet plugin. Use MailPoet 3 with current versions of MailPoet.
Every provider receives the subscriber’s email address, first name and last name. ActiveTrail also receives the billing phone number and country when the customer has one.
Provider settings
These appear on WooCommerce » Settings » Newsletter once your provider is connected.
List
Named after your provider, such as MailChimp List, Brevo List or ActiveTrail Group. The list that checkout, registration and My Account signups join. Lists are remembered for up to an hour, so click Refresh to load one you’ve just created.
Enable Double Opt-in?
Mailchimp only. On by default: Mailchimp emails each new subscriber to confirm, and they join the list once they click the link. Off adds them straight away. Turning it off without consent from your subscribers can get your Mailchimp account suspended.
ActiveTrail account type
ActiveTrail only. Default, or Unique external ID for newer ActiveTrail accounts that can link the WooCommerce customer to the subscriber. If you’re unsure, leave Default, and switch only if subscriptions fail.
First name attribute and Last name attribute
Brevo only. The Brevo contact attributes that store the subscriber’s first and last name. Leave one empty to not send it.
Tags attribute
Brevo only. The Brevo contact attribute that stores the product tags. Only text attributes are listed.
Disconnect account
Click Disconnect to remove the saved API key and choose a provider again, for example to change your API key or switch provider. Your other settings, such as the list and the subscription settings, are kept.
Subscription settings
In the Subscription Settings section of WooCommerce » Settings » Newsletter.
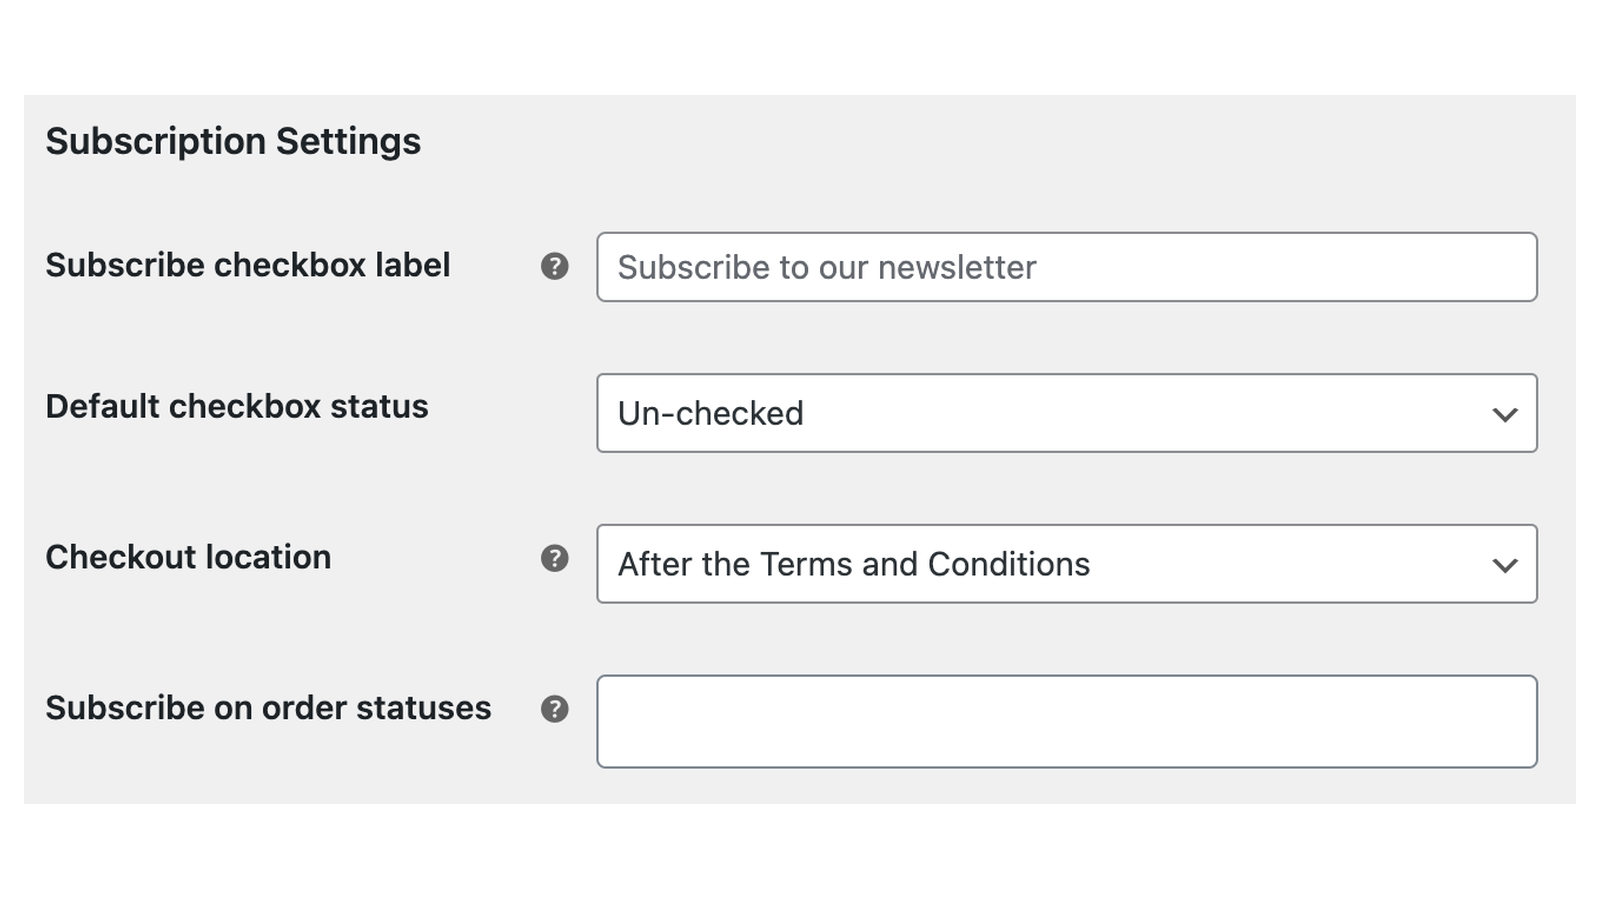

Subscribe checkbox label
The text next to the subscribe checkbox at checkout, on the registration form and in My Account. Empty uses "Subscribe to our newsletter".
Default checkbox status
Checked (the default) or Un-checked: whether the box starts ticked. Some countries, including those in the European Union, don’t allow pre-ticked consent boxes, so check the rules where you sell.
Checkout location
After the Terms and Conditions (the default) or After billing details: where the checkbox sits on the classic checkout. It isn’t shown when your checkout page uses the checkout block, where the checkbox always sits in the Contact information section.
Subscribe on order statuses
When customers who ticked the box at checkout are subscribed. Leave it empty to subscribe them at the order’s first status change, or pick statuses such as Processing or Completed to wait until the order first reaches one of them. See When customers are subscribed.
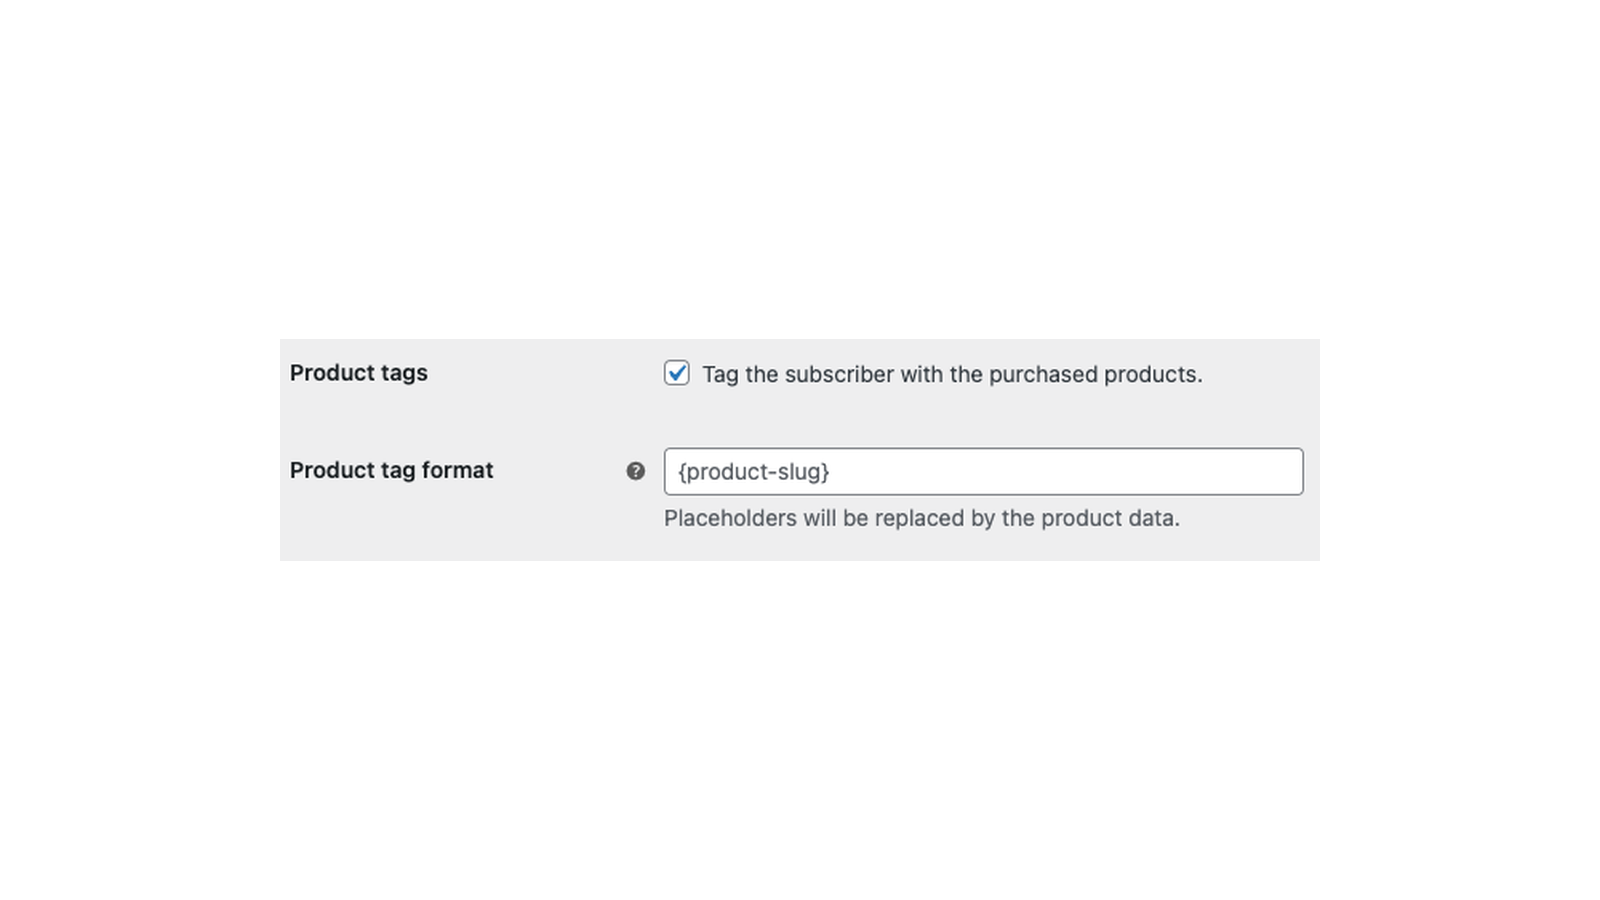
Product tags
Mailchimp and Brevo only. Tags subscribers who check out with the products they bought. Off by default. With Brevo, also choose a Tags attribute.
Product tag format
How each product tag is written. {product-slug} is replaced with the product’s slug, so product-{product-slug} tags a buyer of "Blue Mug" with product-blue-mug. Empty uses the slug alone. Always include {product-slug}, or every product gets the same tag.
Manage subscription
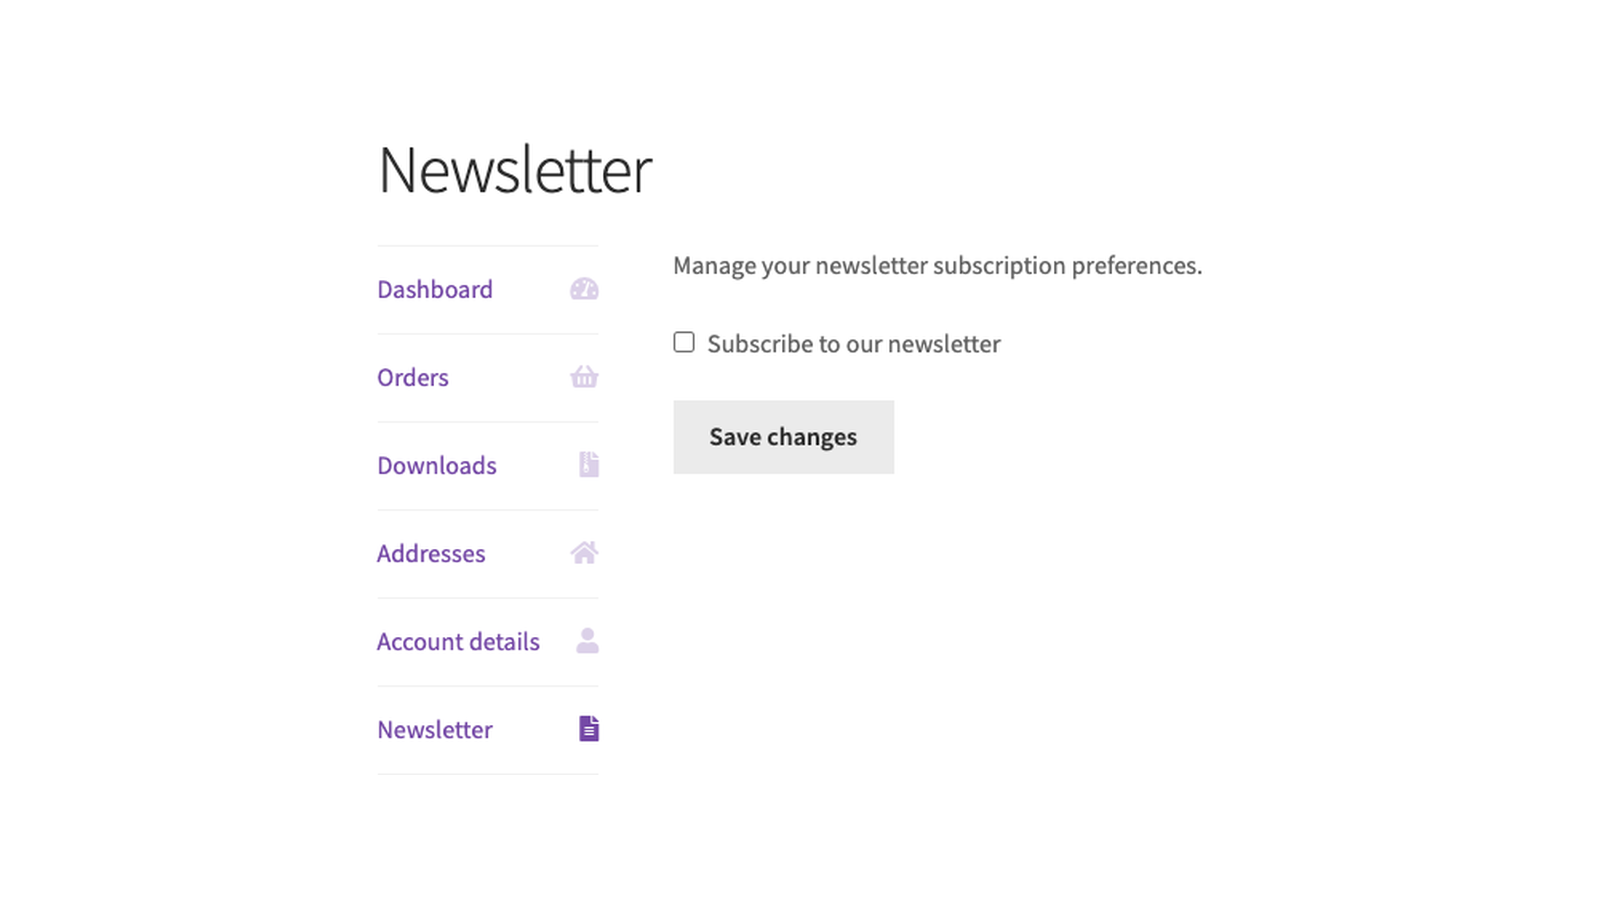
Mailchimp only. Adds a Newsletter page to My Account where logged-in customers can subscribe or unsubscribe. On by default.
Where customers subscribe
At checkout
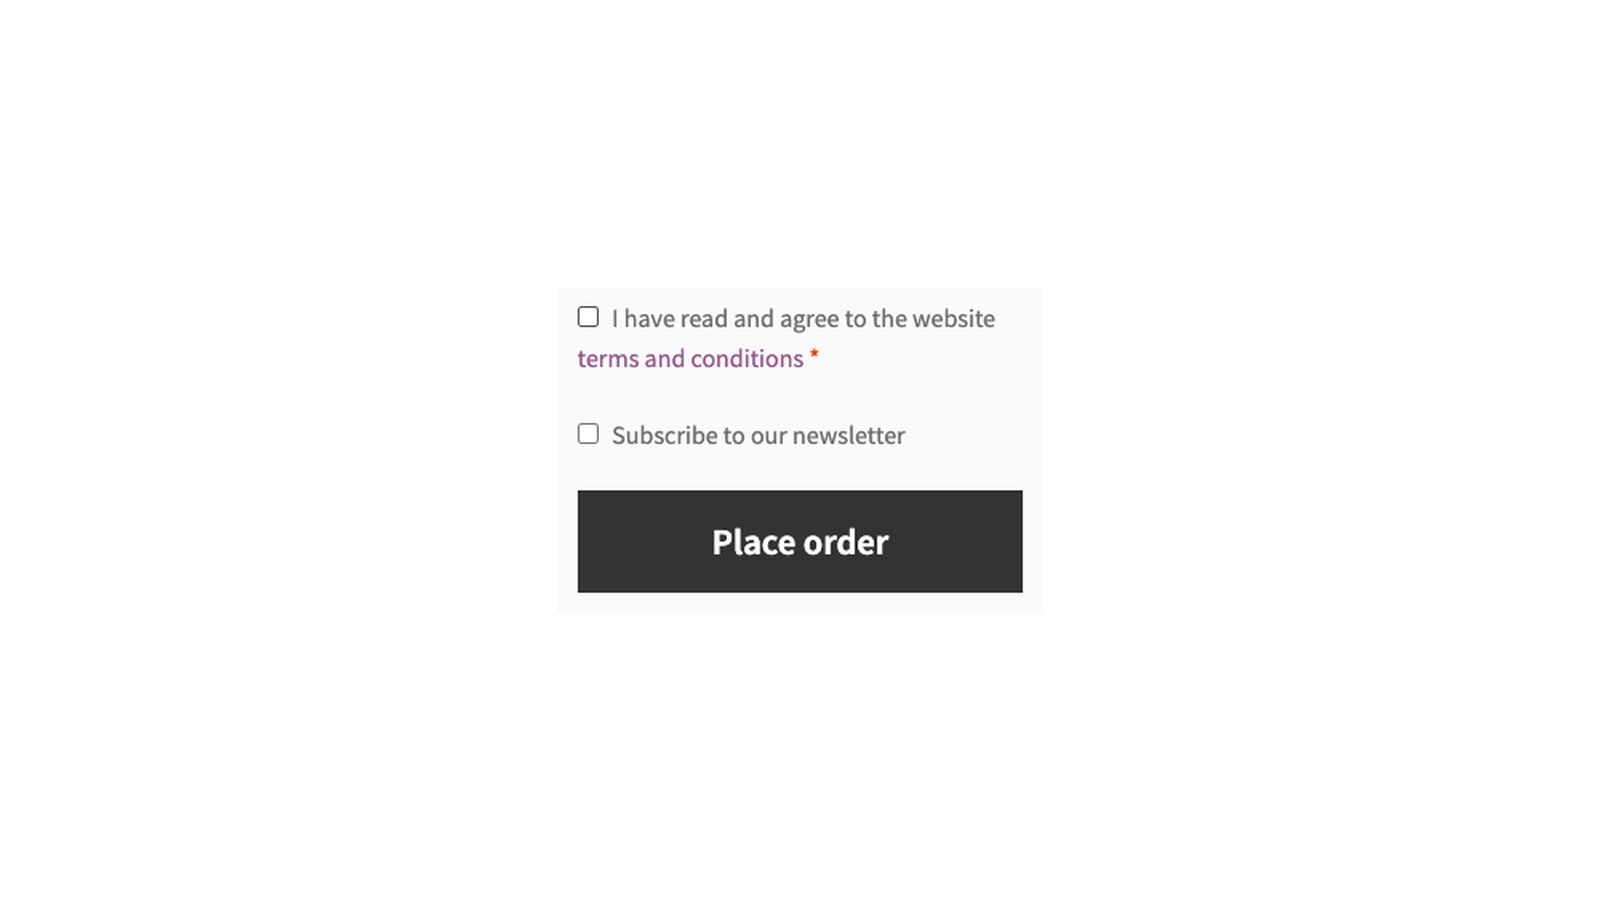
The subscribe checkbox appears on the classic checkout where Checkout location puts it, and in the Contact information section of the checkout block. Customers who tick it are subscribed with their billing email and name.
On the registration form
The same checkbox appears on WooCommerce’s account registration form in My Account. Customers who tick it are subscribed as soon as their account is created. The form only shows when Account creation has On "My account" page ticked, under WooCommerce » Settings » Accounts & Privacy.
In My Account
With Mailchimp and Manage subscription on, logged-in customers get a Newsletter page in My Account. They tick or untick the checkbox and click Save changes, and see "Newsletter subscription preferences changed successfully." The box shows ticked only once Mailchimp lists them as subscribed, so with double opt-in it stays unticked until they confirm.
With the widget
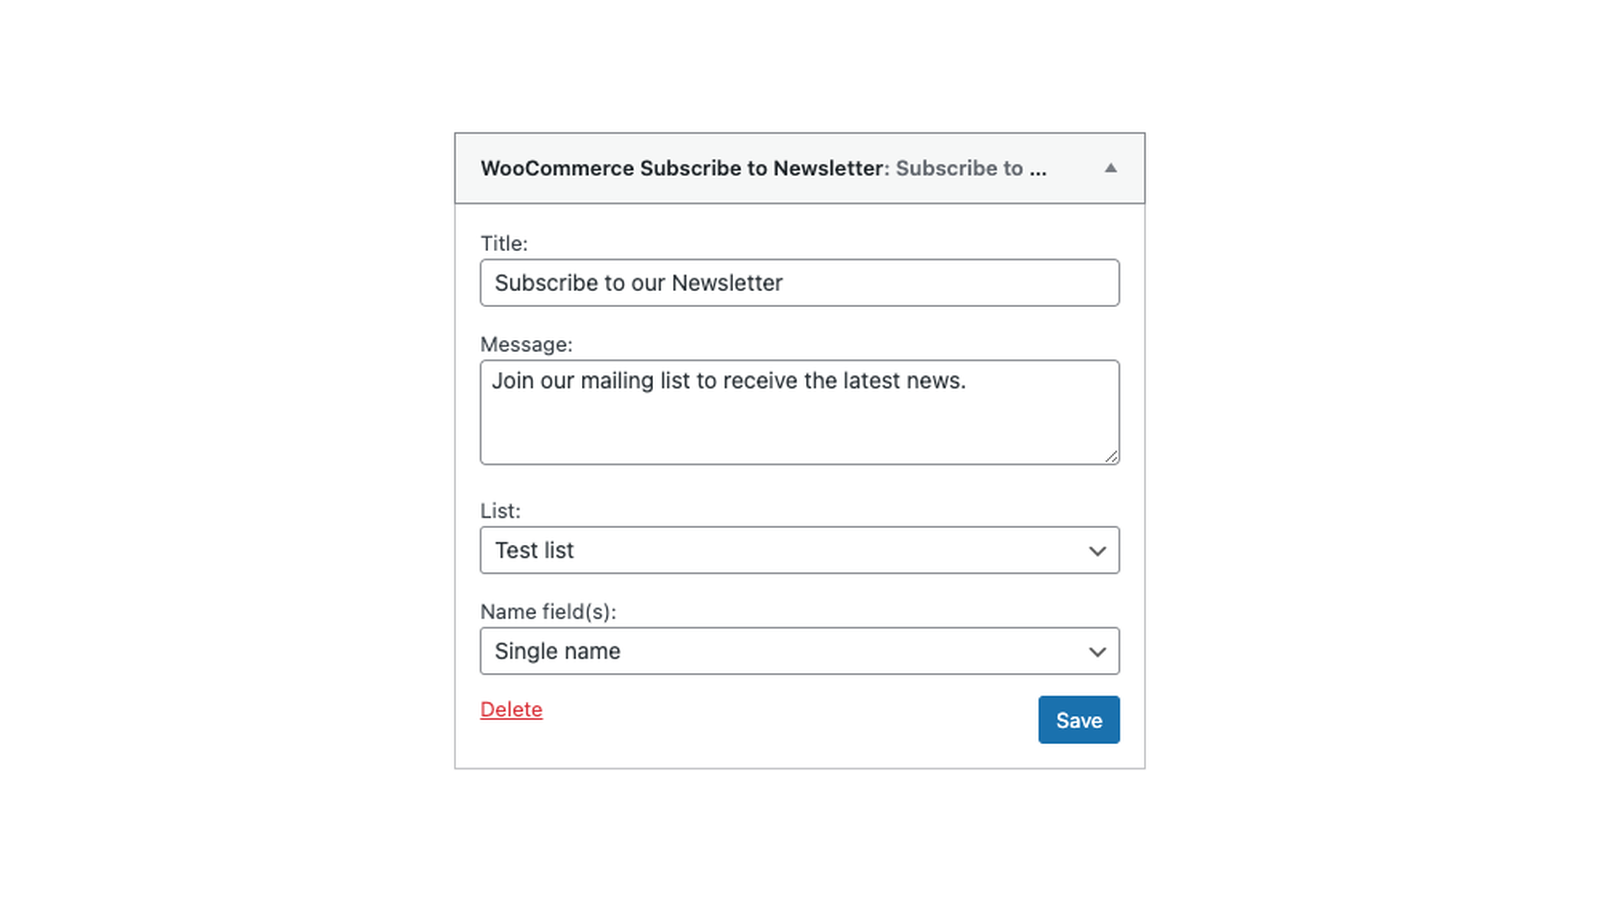
Go to Appearance » Widgets and add WooCommerce Subscribe to Newsletter to a widget area. Your theme needs widget areas for this. The widget has these settings:
- Title: and Message: shown above the form, "Subscribe to our Newsletter" and "Join our mailing list to receive the latest news." by default.
- List: the list this widget subscribes to, so widgets in different areas can feed different lists.
- Name field(s): No name (the default), Single name or First + Last name. A single name is split at the first space into first and last name.
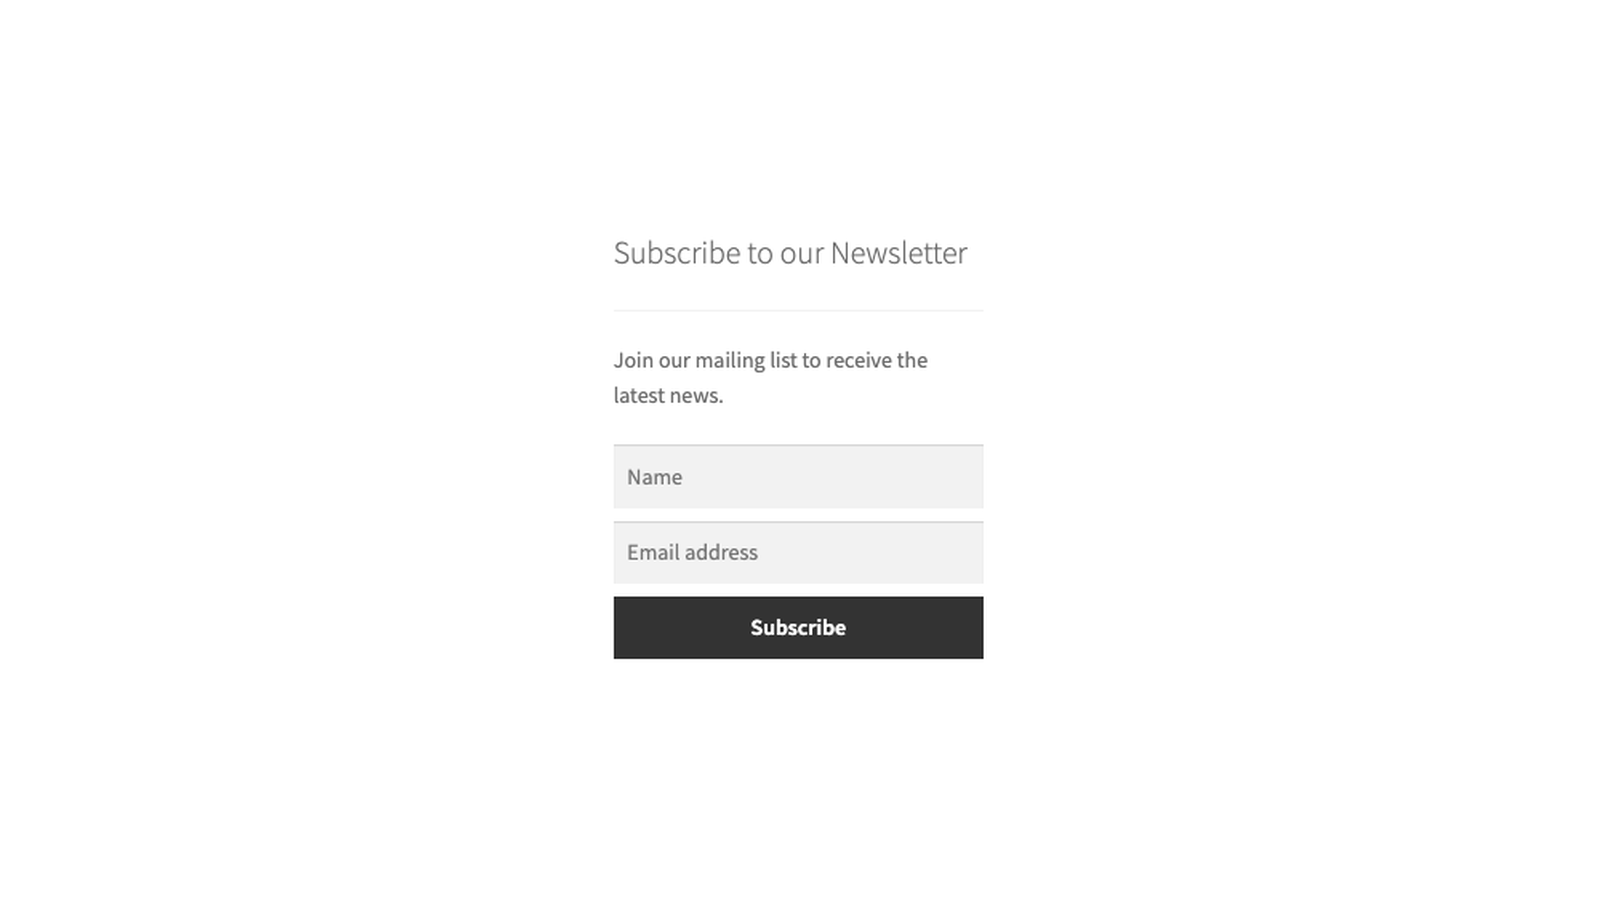
Visitors enter their email address and click Subscribe, and see "Thanks for subscribing." To stop automated signups, each visitor can submit the form three times in five minutes. To change the widget’s labels and messages, see changing text in a plugin.
When customers are subscribed
- Checkout: at the order’s first status change, or at the first status in Subscribe on order statuses. A checkout block order changes status as soon as it’s placed, so its customer is subscribed straight away. A classic checkout order starts as Pending payment and is subscribed at its first change, such as to Processing or On hold once the payment goes through, or to Failed. Each order subscribes once.
- Registration, My Account and the widget: straight away.
When a subscription fails, the plugin emails your site’s admin address with the subject "Email subscription failed" and the provider’s error message.
Dashboard stats
Store managers and administrators see a Newsletter subscribers box on the WordPress dashboard, with recent figures from your provider and a Refresh button. The figures depend on the provider. MailPoet 3 doesn’t report stats, so the box doesn’t show for it.
Points and Rewards
With WooCommerce Points and Rewards, go to WooCommerce » Points & Rewards, open Settings, and in Points earned for actions set Points earned for newsletter signup. A customer earns the points once, the first time an email address belonging to a store account subscribes through the plugin. Guests and widget signups without an account earn nothing.
Privacy
Subscribe to Newsletter sends each subscriber’s email address, first and last name to your provider, plus product tags with Mailchimp or Brevo, and phone number and country with ActiveTrail. It adds suggested text to Settings » Privacy, under Policy Guide, naming your provider. It doesn’t send anything about customers who leave the box unticked.
The plugin’s admin screens may also show an optional prompt to join Kestrel’s own newsletter. If you click Sign up, your name, email address, site name and address, language, and WordPress, WooCommerce and PHP versions are sent to Kestrel’s email provider, Klaviyo. Nothing is sent unless you sign up.
When you delete the plugin, it removes your provider connection and its settings. Subscribers stay in your provider’s lists.
Common issues
"The credentials are not valid."
Your provider rejected the details. Copy the API key again from your provider’s account settings, with no spaces before or after it.
With ActiveCampaign, the first save checks the key against the previously saved ActiveCampaign API URL, so a new URL fails the first time. The URL is saved anyway: enter the API key again and click Save changes a second time.
"This provider requires the WordPress plugin "MailPoet" to work."
Install and activate the MailPoet plugin, then choose MailPoet 3 again.
The subscribe checkbox doesn’t show at checkout
Choose a list in your provider’s list field on WooCommerce » Settings » Newsletter. The checkbox only appears once a list is set. On the classic checkout, also check Checkout location; some themes leave out the area it’s placed in, so try the other location.
My new list isn’t in the list field
Click Refresh next to the list field. Lists are remembered for up to an hour.
Customers who ticked the box aren’t in my list
- Check Subscribe on order statuses. If it’s set, customers are subscribed only when their order reaches one of those statuses.
- With Mailchimp’s double opt-in, they’re added as pending until they confirm Mailchimp’s email.
- Look for an "Email subscription failed" email at your site’s admin address. It has the provider’s reason.
Mailchimp says "Enter a value"
The error looks like [{"field": "FNAME", "message": "Enter a value"}]. That field is required in your Mailchimp audience, but the plugin sent no value for it. The plugin sends only the email address, first name and last name, and the names are empty for widget signups without a name field. In Mailchimp, open your audience’s field settings and make the field optional.
Every product gets the same tag
Product tag format doesn’t contain {product-slug}. Add it, such as product-{product-slug}.
The Newsletter page doesn’t show in My Account
The page only exists with Mailchimp, with Manage subscription on and a list chosen. If it shows but opens a "page not found" error, go to Settings » Permalinks and click Save Changes.
The Checkout location setting is missing
Your checkout page uses the checkout block, which places the checkbox in the Contact information section.
The widget shows an error
- "Please, enter a valid email address.": the address isn’t valid.
- "Too many attempts to subscribe. Try it again later.": the visitor submitted the form three times within five minutes.
- "An unexpected error happened.": the widget has no list. Edit the widget, choose a List: and save.
- "Oops! Something went wrong.": the provider refused the signup. Check for an "Email subscription failed" email.
My provider isn’t supported
The plugin connects only to the providers above. To reach another platform, a bridge plugin such as WP Fusion can connect WooCommerce to many more.
Keep learning
- How to install and update WooCommerce extensions (installing, updating and fixing upload errors)
- Using sites against your activation limit (how license activations count)
- Changing text in a plugin (editing the widget’s labels and messages)