


Order Delivery adds a delivery or pickup date to your WooCommerce checkout. Customers either pick a date, and optionally a time frame, from a calendar, or see an estimate of when their order will ship and arrive. You decide when you prepare orders, which days and times you deliver or open for pickup, how many orders each slot takes, and which dates are closed.
The chosen date appears on the order, in the order emails and in the customer’s account. Order Delivery schedules dates only: it doesn’t plan routes, assign drivers or track deliveries, and it doesn’t change your shipping rates apart from optional fees and tips.
When you’d use this
- Let customers choose a delivery day and time slot for groceries, meal kits, flowers or furniture.
- Offer local pickup with its own days and times, alongside delivery.
- Show an estimated delivery date at checkout without asking customers to choose.
- Cap the number of orders per day or time slot.
- Charge extra for weekend or early morning delivery, or accept tips for drivers.
Requirements
- WordPress 6.2 or later, WooCommerce 8.2 or later, and PHP 7.4 or later.
- Works with WooCommerce’s checkout block and the classic checkout, and with High-Performance Order Storage.
- Optional: WooCommerce Subscriptions 3.0 or later, for delivery dates on subscription renewals. See Order Delivery with WooCommerce Subscriptions.
- Dates only show for orders that need shipping, so your store needs shipping zones with at least one shipping method.
Install and activate
How you install and get updates depends on where you got Order Delivery:
- Bought on kestrelwp.com: download the plugin from the Licensed downloads tab of your kestrelwp.com account and install it. Then go to Settings » Order Delivery for WooCommerce activation and activate the key from your License keys tab to receive updates. See using sites against your activation limit for how activations count.
- Bought on WooCommerce.com: install the plugin from your WooCommerce.com account. Updates come through your WooCommerce.com connection, with no license key to enter.
- Included with CheckoutWC: CheckoutWC’s Pro and Agency plans include Order Delivery. You’re emailed a code to redeem on kestrelwp.com, and the license key then appears on the License keys tab of your kestrelwp.com account, with the download on Licensed downloads. From there it works like a kestrelwp.com purchase. If you already installed a copy from WooCommerce.com, replace it with the download from your kestrelwp.com account.
For upload, FTP and update steps, follow how to install and update WooCommerce extensions.
Before you begin
- Set your timezone. Under Settings » General, choose a city for Timezone rather than a UTC offset, so cut-off times are right and follow daylight saving time.
- Check your date settings. The calendar and order dates use the Date Format and Week Starts On settings on the same screen.
- Set up shipping. Under WooCommerce » Settings » Shipping, add the shipping zones and methods you’ll offer. For pickup, add WooCommerce’s Local pickup. Order Delivery treats WooCommerce’s own local pickup, CheckoutWC’s and Local Pickup Plus as pickup, and every other method, including pickup methods from most other plugins, as delivery.
Set up Order Delivery
Every setting below is defined on Order Delivery settings.
1. Choose delivery, pickup or both
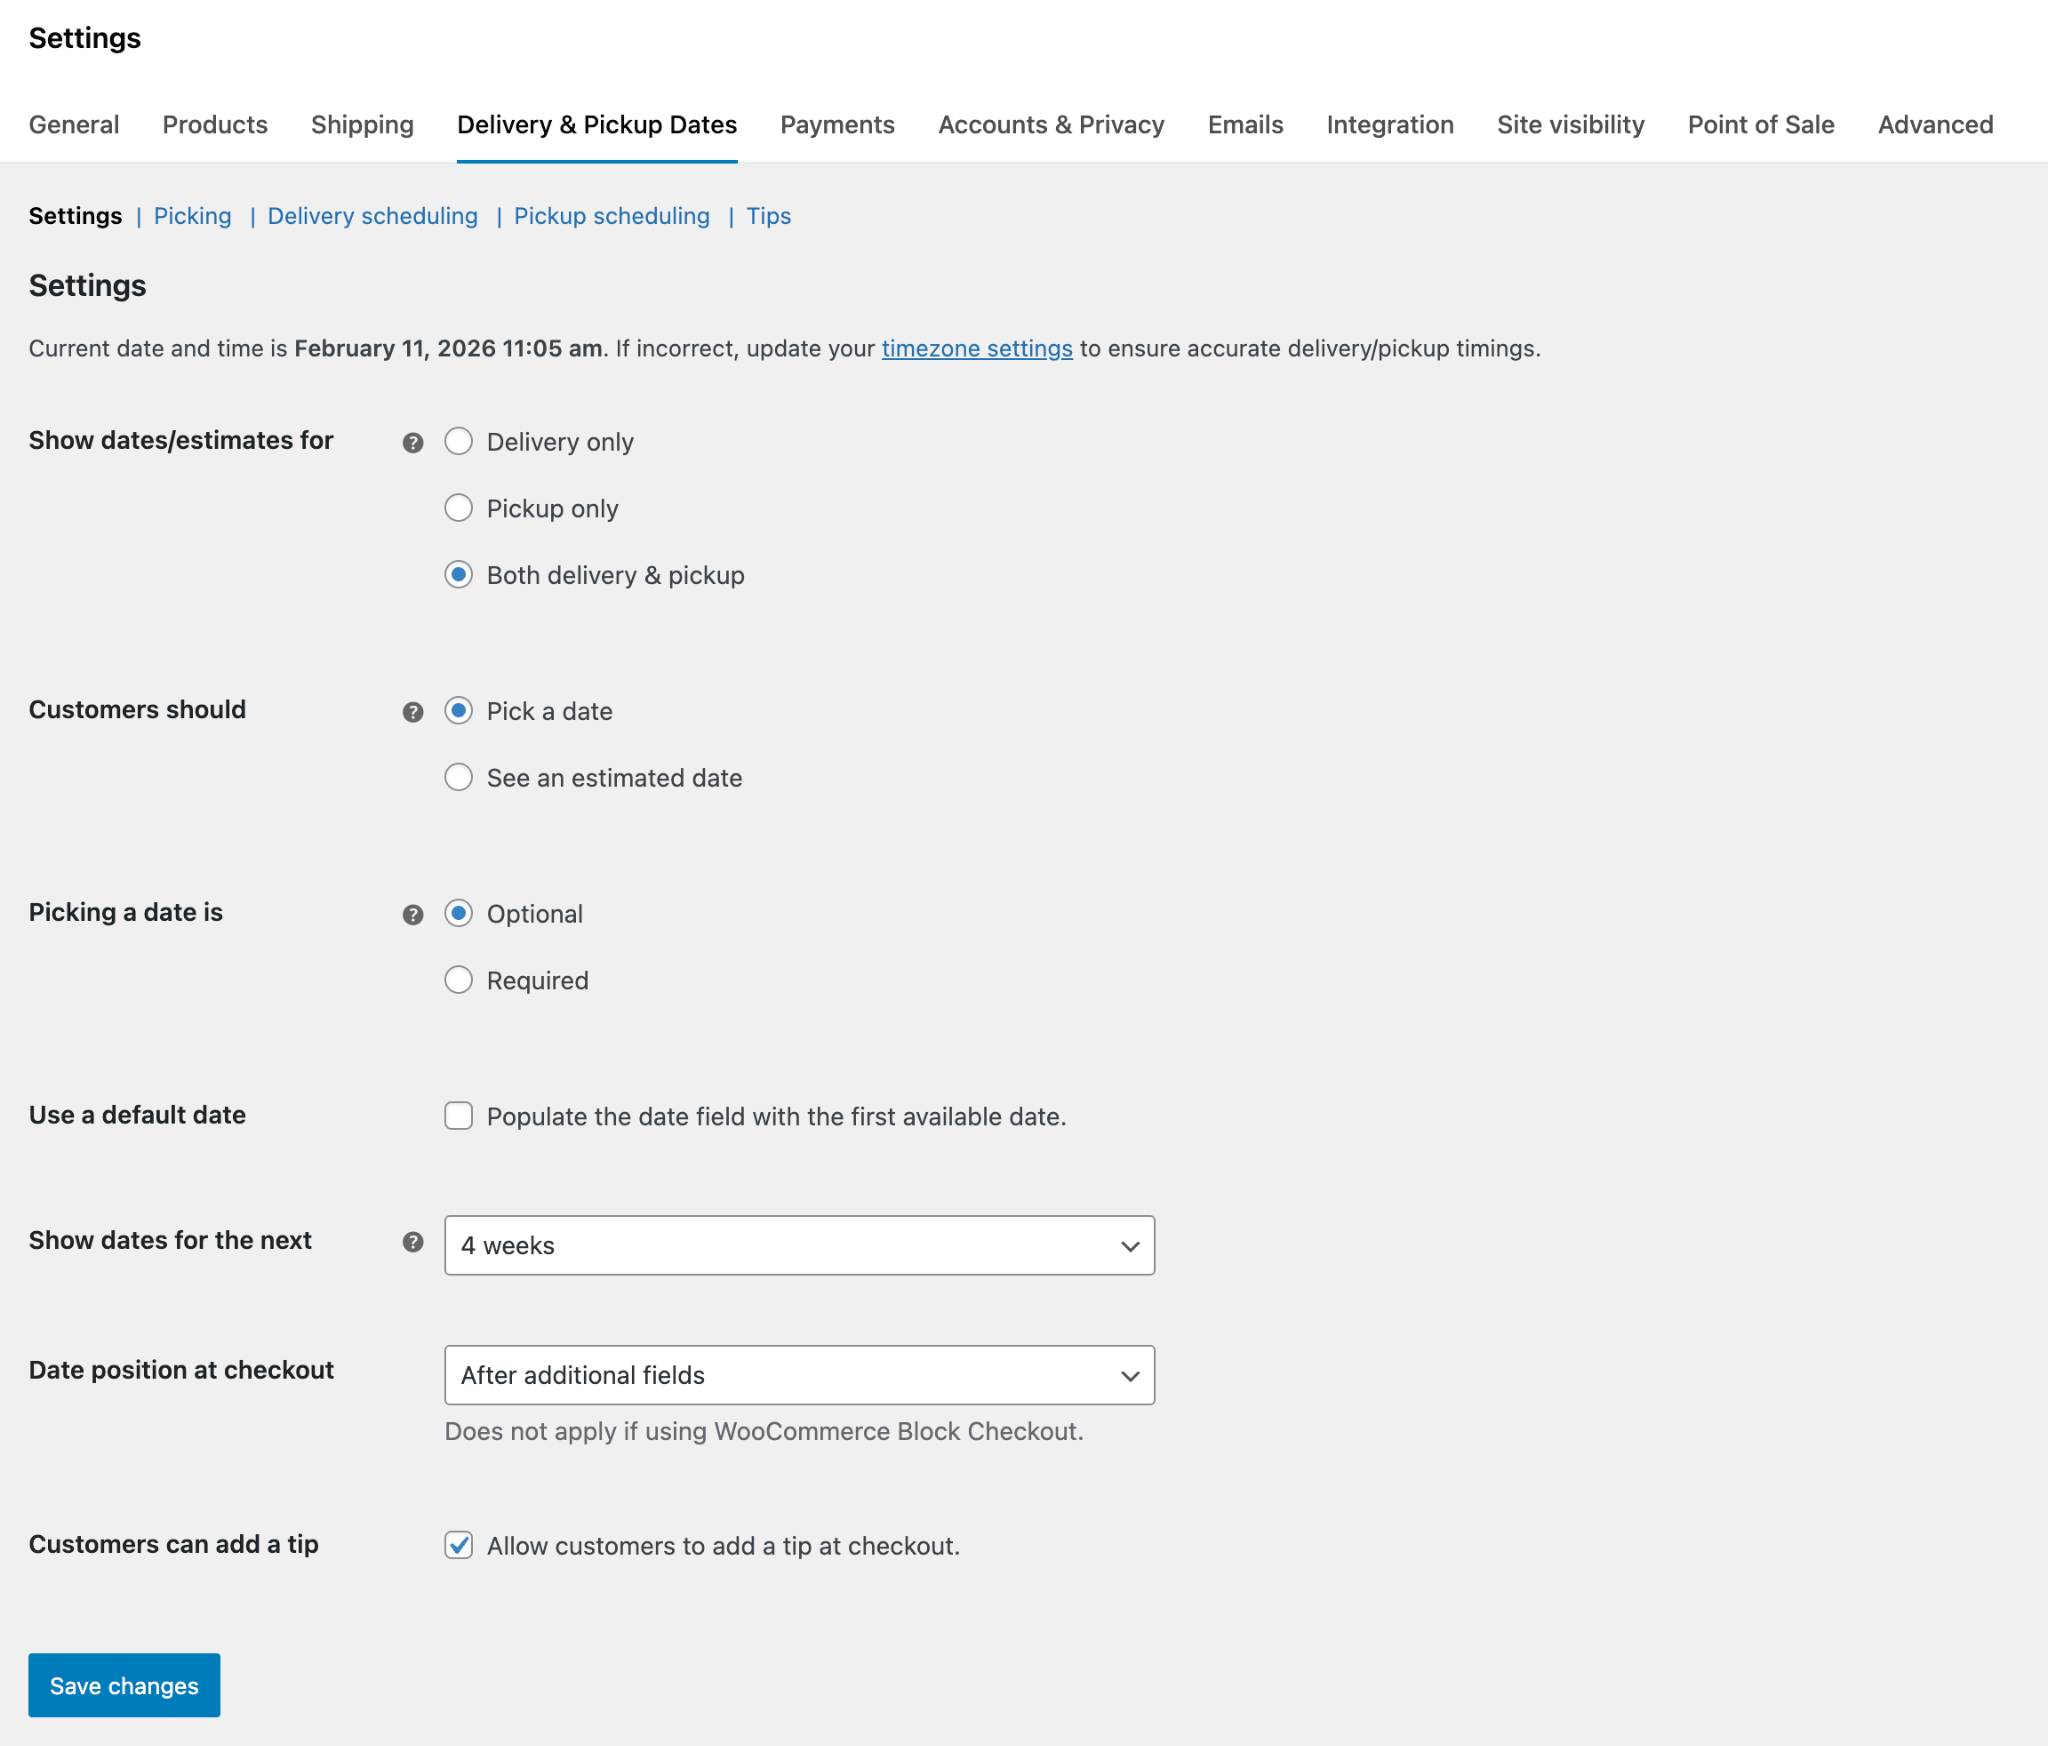
Go to WooCommerce » Settings » Delivery & Pickup Dates and set Show dates/estimates for to Delivery only, Pickup only or Both delivery & pickup. Click Save changes so the matching scheduling sections appear.
2. Choose a calendar or an estimate
Set Customers should to Pick a date for a calendar, or See an estimated date for text only. With a calendar, also choose whether Picking a date is optional or required, and how far ahead customers can choose under Show dates for the next. On the classic checkout, pick a Date position at checkout.
3. Set your picking days, cut-off and lead time
In the Picking section, turn on the Order picking days you prepare orders, set an Order picking cut-off time if late orders should wait for the next day, and set Lead time in days if you need time to prepare. How Order Delivery calculates delivery and pickup dates explains how these set the shipping date.
4. Set your delivery and pickup days
In Delivery scheduling (and Pickup scheduling), turn off the days you don’t deliver or open, and add time frames if customers should choose a time. Set up delivery and pickup schedules covers time frames, order limits, fees and holidays.
5. Check the Default range
Each scheduling section has a Default range of 1 to 10 days, so the earliest date is the day after the shipping date. For same-day delivery or pickup, edit the range and set From (days) to 0.
6. Place a test order and check the order email
Add a physical product to your cart, choose a shipping method, and check the Delivery details (or Pickup details) section at checkout. Place the order, then check that the date appears in the order confirmation email and in the Delivery date column under WooCommerce » Orders.
What customers see
Classic checkout
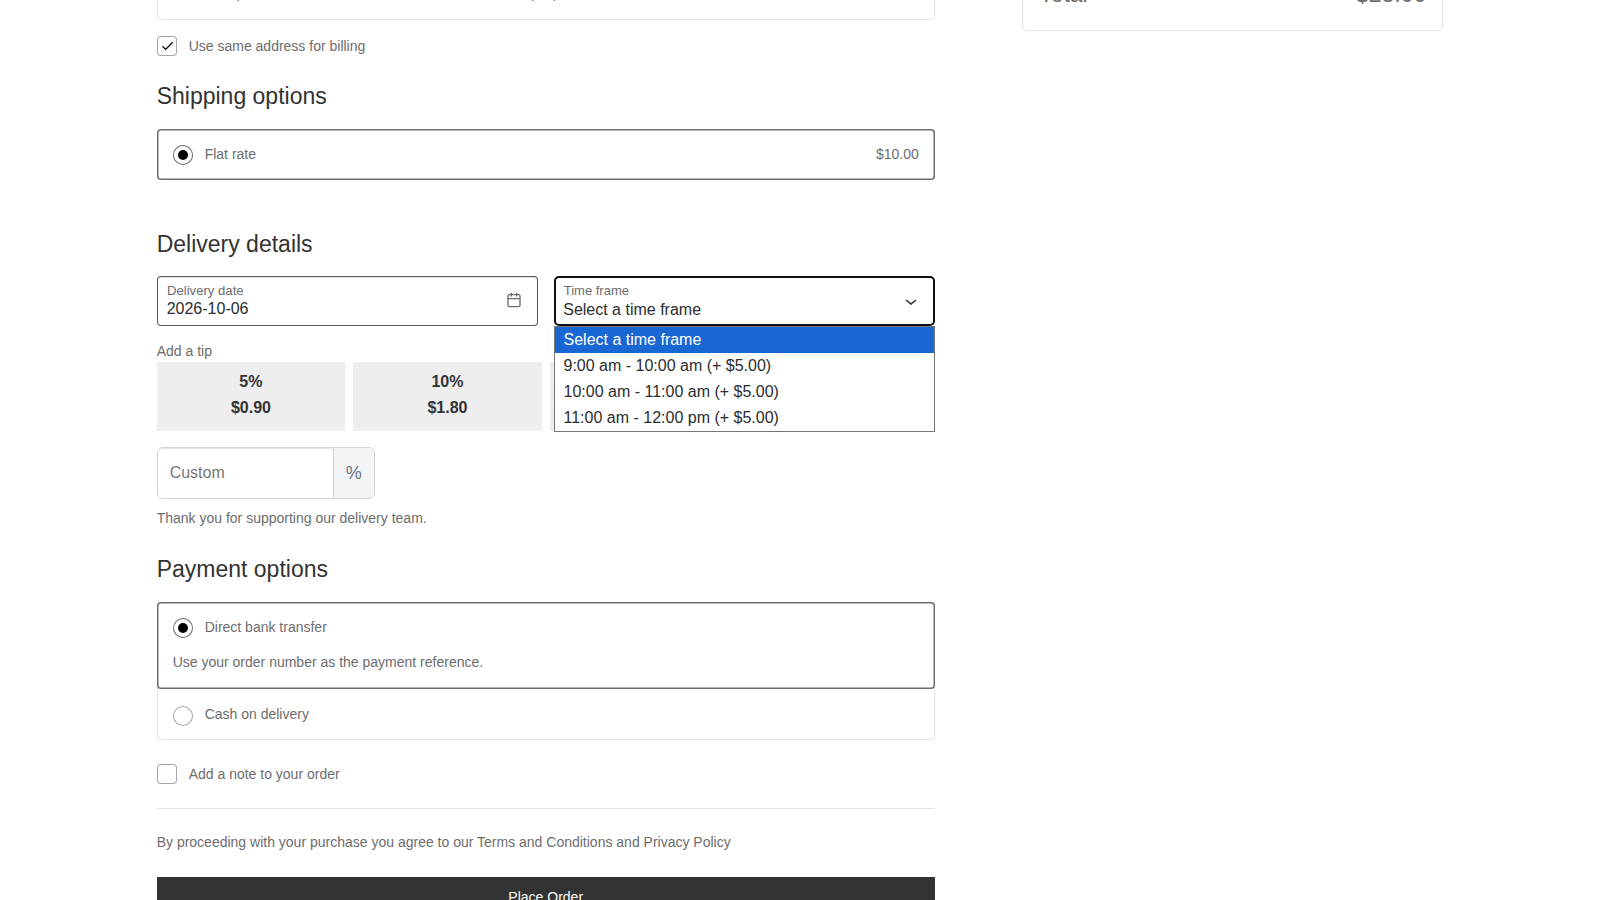
A Delivery details (or Pickup details) section appears at your Date position at checkout, with your delivery or pickup instructions and a Delivery date (or Pickup date) field. When the chosen date has time frames, a Time frame list follows, starting with "Choose a time frame". A time frame with a fee shows it next to the time, such as "09:00 – 10:00 (+ $5.00)". Dates that can’t be chosen are grayed out in the calendar.

Checkout block
The same details appear inside the Shipping options block, or inside the Pickup options block when the customer chooses pickup. The time frame list reads "Select a time frame". You can’t move the details elsewhere on the checkout block.

Estimates
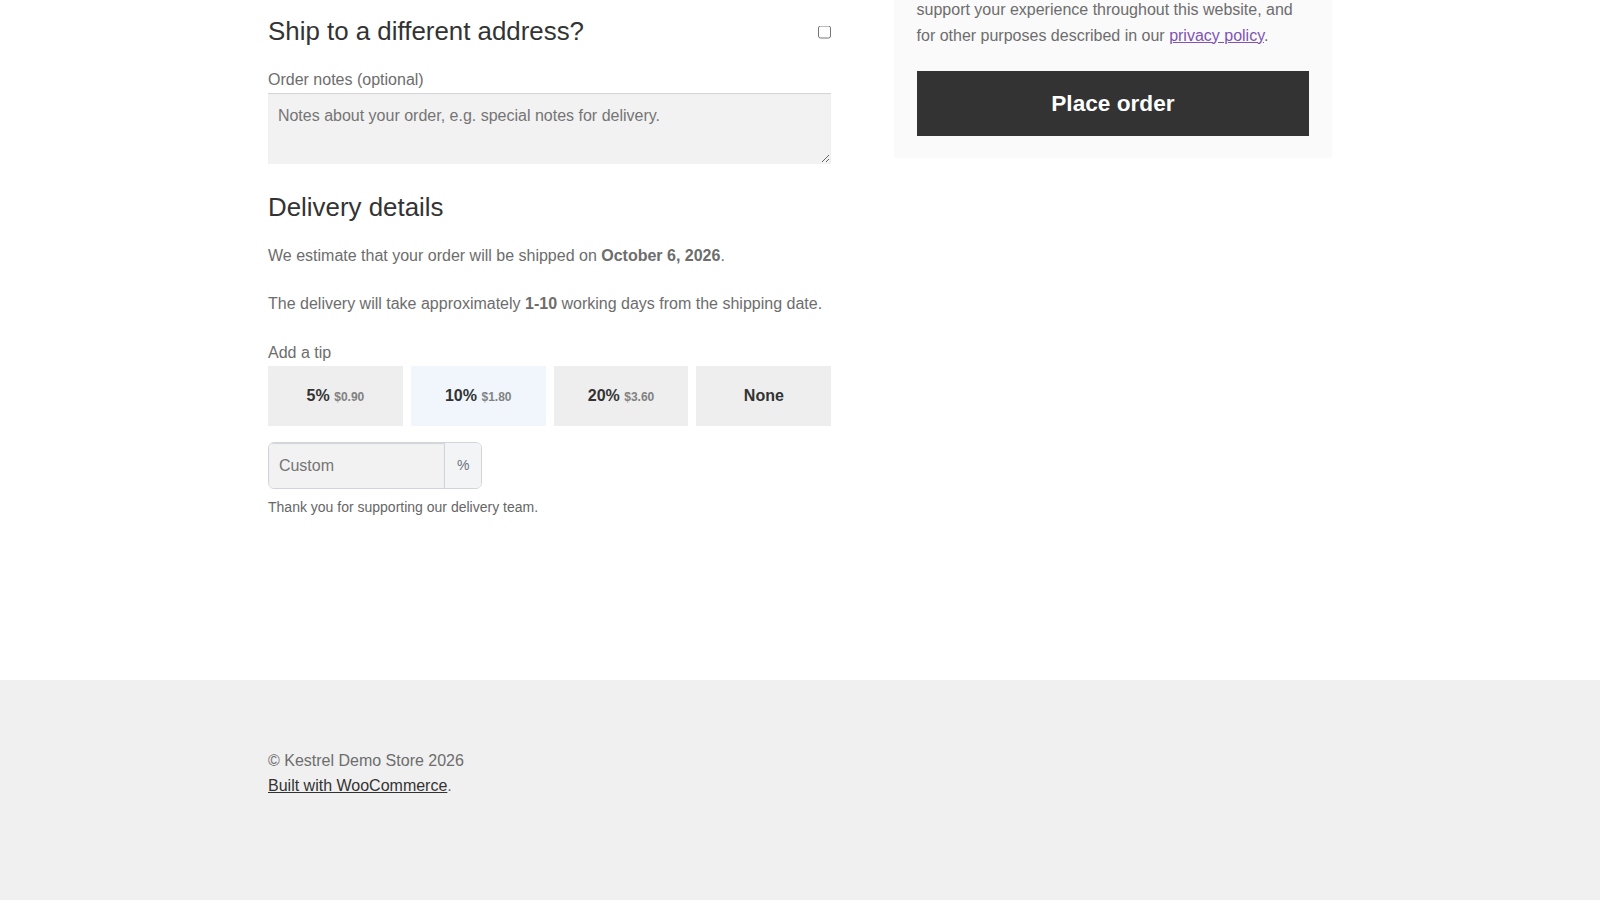
With See an estimated date, customers see "We estimate that your order will be shipped on [date]." followed by "The delivery will take approximately [days] working days from the shipping date." Pickup customers see "Your order will be ready to pick up on [date]."
Backorders
With a calendar, if every item in the cart is on backorder, there’s no date to pick, and customers see "Some items in your order are on backorder. We will contact you via email to arrange delivery once your items are available." If only some items are on backorder, they see the same message and can still pick a date. On the checkout block, pickup customers see the message with "arrange pickup" instead.
Thank you page and My Account
The order’s delivery or pickup date and time frame appear on the order received page and under My Account » Orders » View.
Emails
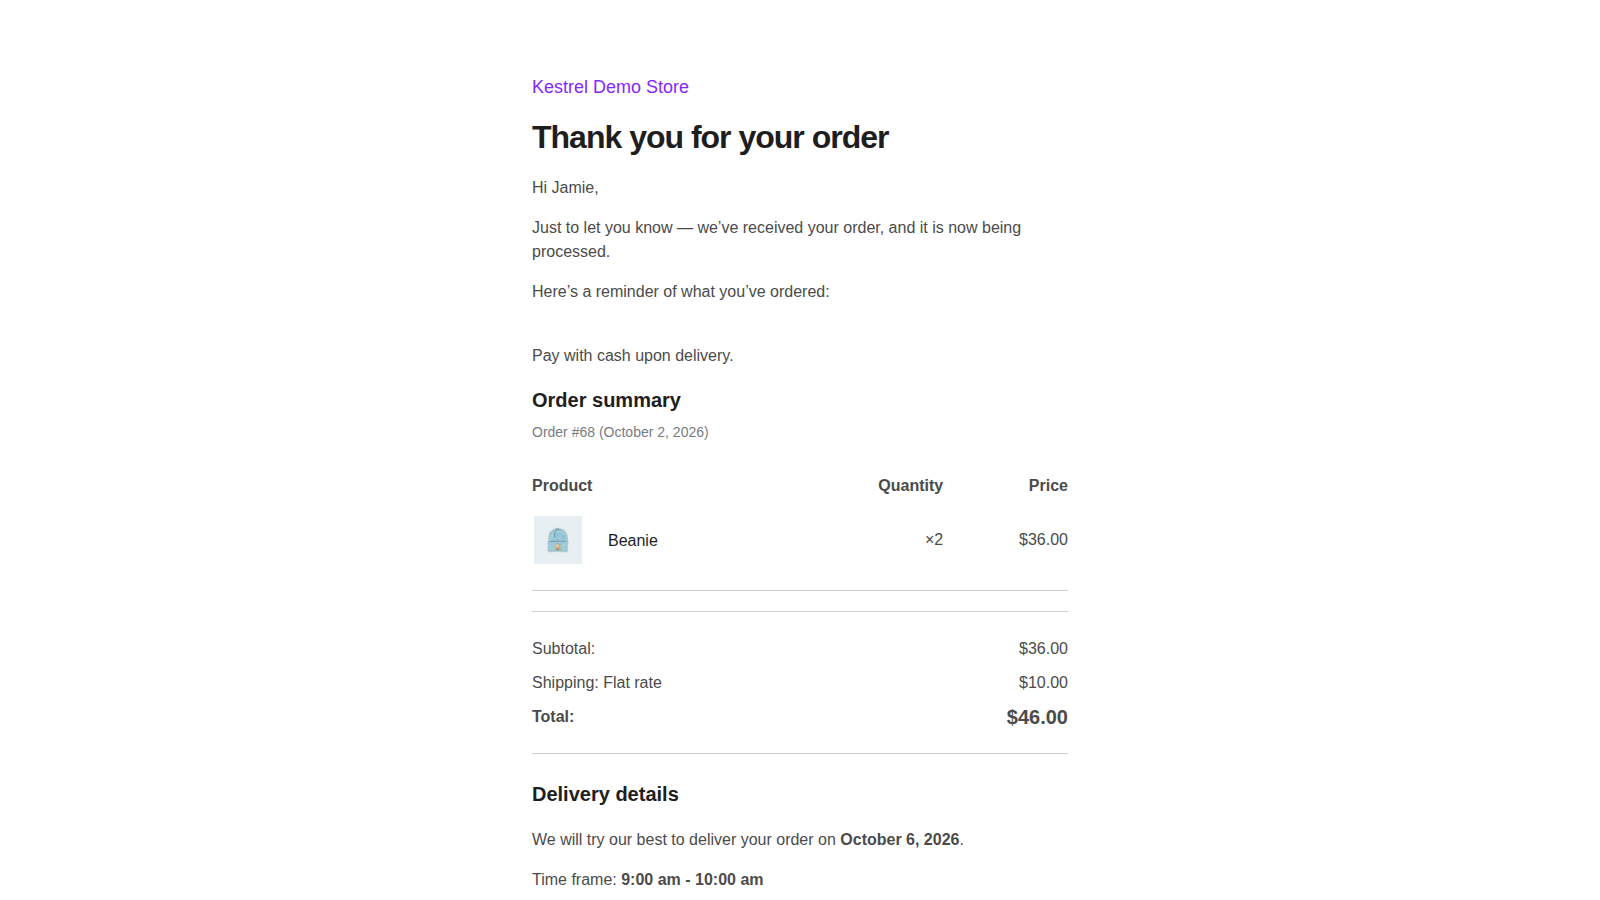
The date and time frame are added to the New order, Customer note, Order on-hold, Processing order, Completed order and Customer invoice emails, as "We will try our best to deliver your order on [date]." or "Pickup date: [date].", followed by "Time frame: [time]".
Common issues
The date field doesn’t appear at checkout
The most common causes are a cart that doesn’t need shipping, a pickup method while Show dates/estimates for is Delivery only (or a delivery method while it’s Pickup only), and no available date within Show dates for the next. Troubleshoot Order Delivery lists every cause.
The first date is later than expected
Lead time counts picking days only, ranges count from the shipping date, and the Default range starts at 1 day. See How Order Delivery calculates delivery and pickup dates.
Pickup customers stopped seeing dates after an update
Updating from version 3 sets Show dates/estimates for to Delivery only. Follow Upgrade to Order Delivery 4: set up pickup again.